• Pulled Pork For Memorial Day

    Pulled pork sandwich with the works.

    UPDATE: This is a reblog from last year. But Memorial Day is coming and this is still our favorite BBQ recipe. Enjoy!

    We’re posting a number of summer food and cocktail recipes for Memorial Day weekend, so let’s get going. We will start with our favorite “summer” dish, pulled pork. Also simply known as pork barbecue, pulled pork is one of the most tender, succulent and flavorful meat dishes you can find. Nothing feeds, and pleases a crowd, like a brined, rubbed and slowly smoked pork shoulder. And it is pretty easy to make. You just need one ingredient: time. Lots of time (some planning and patience help too). But it is worth making this dish, particularly for a holiday weekend.

    Pulled pork sandwich.

    In case you are unfamiliar with pulled pork, it is a pork shoulder (also known as Boston butt) that’s smoked at a low temperature for a long span of time. Usually, though not always, the pork is also brined and a spice rub is added for extra flavor. The long, low-temperature cooking breaks down the fat and connective tissue in the shoulder into gelatin that bathes the meat and provides the tender “finger-licking” flavor of great barbecue. Pulled pork is cooked everywhere in the US, but its spiritual home is the southeast. Texas has beef brisket, the Mississippi river region has ribs, but the Carolinas have pulled pork. We like the Carolinas.

    As for making the pulled pork, it can be a 1-day or 2-3 day operation, it simply depends on the time you have. The most basic approach is to get a pork shoulder and rub it with salt and pepper. Then smoke it with hickory or applewood at about 210 degrees for at least 8 hours or until the internal temperature of the pork is at least 190 degrees (shortcut included below). Let the meat rest for an hour and then “pull” or chop it. The meat will shred easily. And this will be good, real good. But it can be so much better.

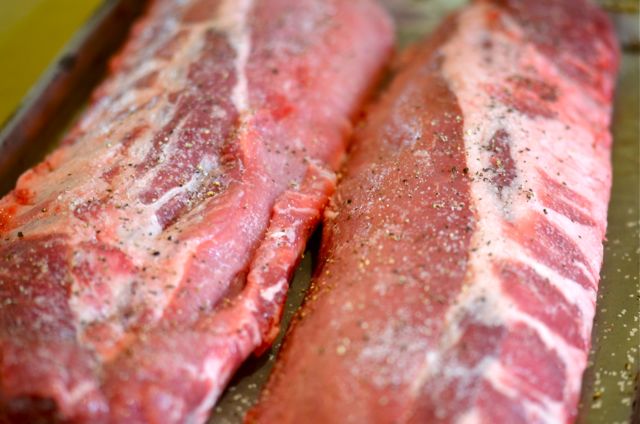
    Pork shoulder ready to brine.

    To take pulled pork to the next level requires a few extra steps and a few extra days. The frist step is to brine the pork shoulder. Pork isn’t as fatty as it used to be, so added moisture is a good thing while cooking, as is extra flavor from the brine. The brine is just a combination of salt, sugar and water (plus seasonings if you like). Pork will benefit from as little as 6 hours of brining, but up to 48 hours will help without making the pork too salty. 12-24 hours is about right. And making the brine is as easy as boiling water with sugar and salt and letting it cool. Once the brine is cool, you place the pork in the brine and keep it in the fridge.

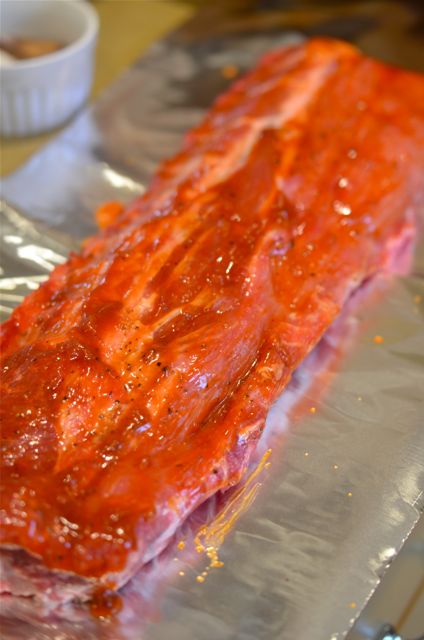
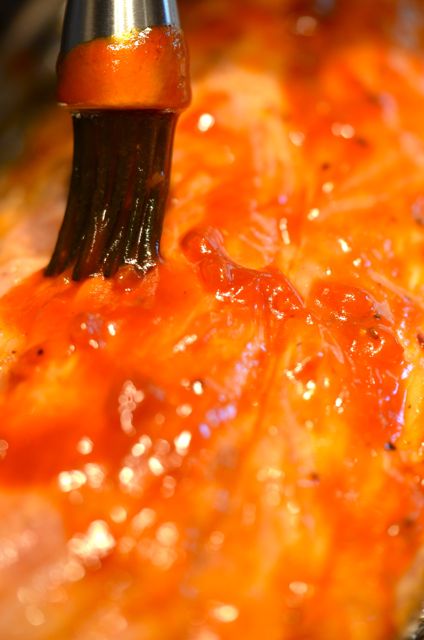
    “Rubbed” pork shoulder, note the liberal application of dry rub.

    The next step is to add a dry rub to your pork shoulder. Spice rubs add flavor to the meat and develop an attractive and tasty, “bark” on the outside of the meat while cooking. And if you let the rub sit on the least overnight, the flavor will penetrate deep into the pork and add a new dimension of flavor

    There are literally thousands of pork rub variations, and you can make most of them at home. While purists my scoff, you can also buy pork barbecue rubs at the grocery store. We make our own, but also use store-bought with success. We include a recipe based on a combination of a Alton Brown’s and Steve Raichlen’s (good BBQ writer, btw) rubs with a few tweaks of our own. But, in general, if you like a flavor like thyme or cumin, add a little more.

    Pork shoulder in the smoker. Grab a beer this will take a while…

    So once you brine and rub the pork, you are ready to smoke. If you have a dedicated smoker, that is great (we use a Big Green Egg- very good tool). If not, most grills have instructions for smoking, please follow them. Weber kettle grills are easily adapted to smoking and do a great job. Gas grills also work. The key is to cook low and slow and get good smoke. We use a mix of 50/50 applewood and hickory and soak the woodchips or chunks for at least 30 minutes. Soaking the wood is critical, you want the wood to smoke, not burn. The other critical element is temperature control. You want to keep an even temperature at about 210 degrees. It usually takes some time to control the airflow on your smoker to reach, and maintain, the right temperature, but it’s worth it. The goal is to slowly build the internal temperature of the pork to at least 190 degrees- this is what gets you the “finger-licking” texture of great barbecue. Normally this will take 8-10 hours, but there are other ways that save you a little time.

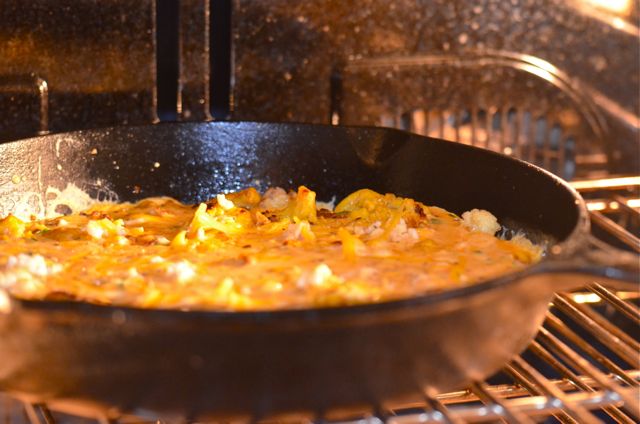
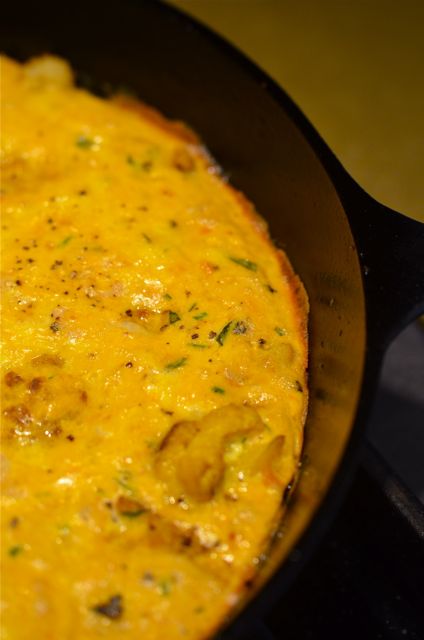
    Optional shortcut- finish in the oven. Just get to at least 190 degress internal temperature.

    Again, traditionalists my be horrified, but it is generally accepted science that the pork will absorb most of the smoke flavor in the first 3-4 hours of smoking. So after 3 hours of smoking you could move the pork shoulder into a lidded Dutch oven or covered roasting pan and cook in a 300 degree oven for 3-4 hours, or until you reach 190 degrees internal temperature. If we have time we will smoke the full 10 hours, but we use the oven method quite often. And if you are entertaining, the “finish in the oven” method is much more convenient and lets you control the timing.

    “Pulling” the pork just before service.

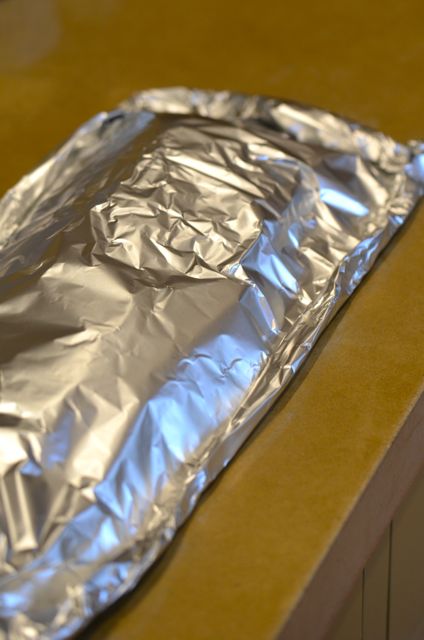
    There is one last step that cannot be ignored, regardless of how you cook the pork. After reaching the desired temperature the pork needs to be covered, or wrapped in foil, and rested for at least an hour. The pork will keep cooking but the juices will set in the meat for a better, juicier texture. After the hour is up, just “pull” the pork apart with 2 forks or lightly chop with big knife. The pork will fall apart easily.

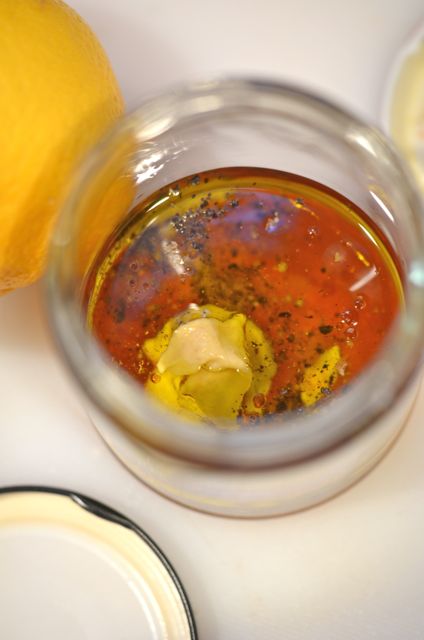
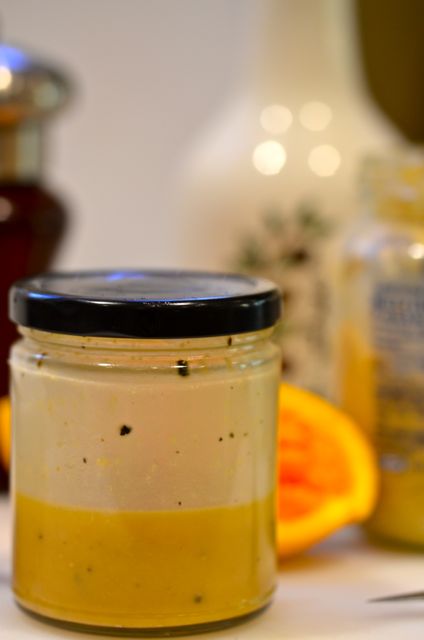
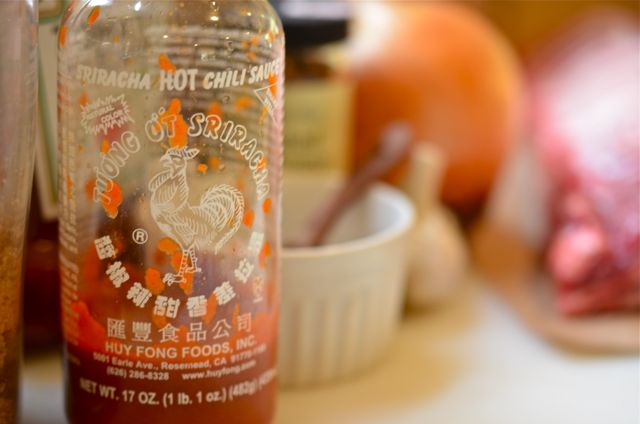
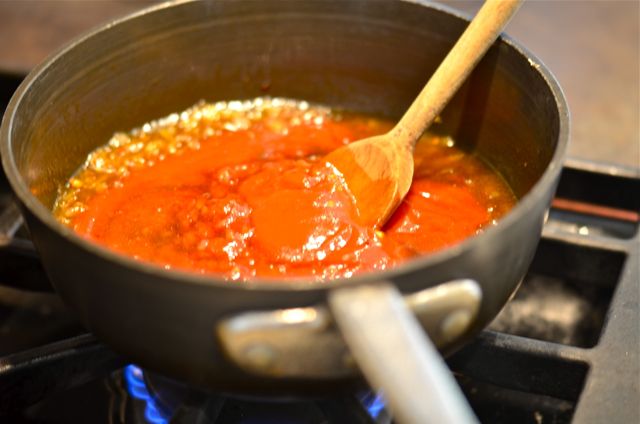
    Tasty, easy sauce. Lots of acid, sweet, sour and hot flavors to cut through the rich pork.

    To serve the pork we place a big pile of the meat on an everyday hamburger bun, add some sauce, pile on some cole slaw and finish with a few bread and butter pickles. As for the sauce, we use an adapted North Carolina-style vinegar sauce that is very piquant, but is a bit sweeter and not as bracing. But we suggest you use a style of barbecue sauce you like. And, if you are so inclined, an ice-cold beer is a nice compliment to the pork. In the end, you can serve the pork almost any way you like, you and your guests will be very happy. There is no other dish that says “summer is here, and the living is easy” like pulled pork.

    And a nice cold beer, too….

    Pulled Pork:

    Notes Before You Start:

    • You can use bone-in or bone-out pork shoulder. Bone-in may be a bit juicer, but you can get rub into the center of the bone-out shoulder for more flavor.
    • If you order the pork shoulder from your butcher, tell them not to take off too much fat. It will mostly render during cooking, but helps keeps the meat moist.
    • If you see a red ring near the outside of the meat, this is OK. In fact, it means you did a good job smoking the meat. The red color is a chemical reaction to the smoke.

    What You Get: An American classic and one of the best pork dishes in the world. Period.

    What You Need: A smoker or grill that adapts to smoking.

    How Long: At least 1 day and if brining and rubbing the pork, at least 3 days. Pulled pork is a “special occasion” dish that requires planning. We posted on Monday so you can get ready for the weekend.. 😉

    Continue reading

  • Smoky Cauliflower Frittata

    Smoky Cauliflower Frittata.

    Smoky Cauliflower Frittata.

    frit2We almost never do this, but we are enjoying Yotam Ottolenghi’s (YO) cookbook “Plenty” so much that we are posting another recipe. This wasn’t exactly by plan, but we like this recipe a lot and have the photos, so why not? And the other new cookbook we are working from that will go nameless Nigella, isn’t working out quite as well- at least, not yet. But if this keeps up, YO may end up in Alice Waters’ territory as far as being a “go-to” source for vegetable recipes. In our part of the world that is lofty company (although we gather that this wouldn’t be a surprise in the UK).

    frit6frit7Oddly enough, this frittata is more about the eggs and cheese than the cauliflower, but it is easy to make and tastes good (and the vegetables give at least the appearance of a healthy dish). That makes us happy. And using scamorza (smoked mozzarella) makes us even happier. This cheese melts evenly and has smoky, but clean, flavor that works incredibly well with the sweet, caramelized cauliflower. And YO then adds some smoked paprika and aged cheddar to accent the scamorza even more. If you haven’t tried smoked mozzarella, this recipe is worth a try. We bet you will want to use it in other recipes.

    frit8frit9frit10The other key to this dish is that YO uses crème fraîche, Dijon mustard and chives in the egg mixture (we added a little tarragon, as well). This adds sharp, herbal and tangy notes that cut the richness of the overall dish (even as the crème fraîche adds a good dose of fat). It’s these little things that make a big difference in the final dish. Without a little tang, this recipe might be all smoky cheese and eggs, good on the first bite, but probably overwhelming as a main dish. But those brighter notes make for a dish that is good from beginning to end. And if you serve this frittata with a nice green salad with a basic vinaigrette, the balance is even better.

    frit11frit12frit13Another good thing about this dish is that it is quick and easy. It will take about 30 minutes total, without a bunch of work. The only extra step is to boil the cauliflower a few minutes before you caramelize it. But this does soften the cauliflower and give you an even texture, so we think the work is worth it. And since the rest is so easy, you barely notice the extra work. Otherwise, this is frittata 101. Start it on the stove top, finish in the oven, let it cool just a bit and serve. A good payoff for the time spent. Happy Monday.

    frit14Smoky Cauliflower Frittata:

    (Adapted from Yotam Ottolenghi’s “Plenty“)

    Notes Before You Start:

    What You Get: An easy dinner with extra flavor. A perfect weeknight dish.

    What You Need: No special equipment required.

    How Long? About 30 minutes, and an easy 30 minutes, at that. Anytime dish.

    Ingredients:

    (Serves 4-6 as a main dish)

    • 1 medium cauliflower cut into small florets
    • 2 tablespoons olive oil
    • 6 large eggs
    • 4 tablespoons crème fraîche
    • 2 tablespoons Dijon mustard
    • 2 teaspoons sweet, smoked paprika
    • 2 tablespoons chopped chives
    • 1 tablespoon chopped tarragon (optional)
    • 5 oz. scamorza or smoked mozzarella, including the smoky rind, grated
    • 2 oz. sharp cheddar cheese, grated
    • Salt and freshly ground black pepper

    Continue reading

  • Seared Ahi With Grapefruit And Fennel

    Seared Ahi with Grapefruit and Fennel.

    Seared Ahi with Grapefruit and Fennel.

    ahiMany of you know how much we like fennel here at the farm. Usually simply caramelized, or in risotto, fennel brings a light anise flavor and subtle, earthy sweetness to many dishes. We love it and think fennel is an underused and under-appreciated ingredient. So when we see a restaurant dish using fennel, we often try it out at home. And in this case, while in Kauai, we tried a dish of seared ahi with a light “slaw” of thinly sliced, barley pickled fennel and supremes of ruby-red grapefruit. It rocked, so we tried to make it at home.

    ahi5ahi6ahi7And we are glad we did. Not only because it was a delicious dish, but it served as a reminder to us about what restaurant dishes we should try to cook at home. In general, we often avoid making restaurant dishes, they tend to be complex, use purposefully esoteric ingredients and are often cooked with equipment most home cooks just don’t have. But then there are restaurant dishes that simply combine quality fresh ingredients with a few basic techniques. The resulting dish seems upscale, and it is, but anyone can make the dish if they know a few tricks. This is one of those dishes.

    ahi4ahi3All you need to make this dish is some very fresh ahi (and that may take some time to find, save this recipe for when you get it), a rocket-hot pan, a very sharp knife and some technique. The hot pan is to sear the seasoned ahi about 45-60 seconds per side (max). That is all you need, then slice the ahi to stop any cooking in residual heat.The sharp knife is to peel the grapefruit and cut “supremes” from between the membranes. This seems like a lot of work, but it takes just a few minutes and is easier than you think. Just do it over a bowl and reserve the juice. Then thinly slice the fennel (we add some radish as well). And if you have a small hand-slicer or mandolin, this gets even easier.

    ahi8ahi9To finish the dish you simply make a quick pickle of the sliced fennel and radish. Quick pickling is one of the easiest ways to quickly add flavor to a dish, you just combine sugar and salt with sliced veggies for about 15 minutes then drain the veggies. We add a splash of rice wine vinegar here as well. Then you assemble the dish. Layer the grapefruit supremes and slices of the ahi and then add a splash of the reserved juice and a bit of rice wine vinegar. Then add the pickled fennel and radish. Season and serve. And the whole thing takes maybe 25-30 minutes.

    ahi1And what do you get? A beautiful, flavorful and balanced dish that is pretty healthy, too. The light but meaty ahi goes very well with the acid of the grapefruit and the sweet, earthy crunch of the fennel and radish. It looks and tastes like a restaurant dish, but almost any home cook can make it.

    ahi10Seared Ahi With Grapefruit And Fennel:

    (Adopted from Bar Acuda in Hanalei, Kauai)

    Notes before you start:

    • You can use most types of tuna for this dish, and you do not have to serve it as rare as we do. But tuna past medium-rare gets very dry. Tuna is expensive, so if you prefer well-cooked fish, other recipes may be a better choice.

    What You Get: A restaurant-quality dish with less work than you think.

    What You Need: No special equipment required, but a hand-slicer or mandolin is always nice for slicing veggies.

    How Long? 25-30 minutes with 10 minutes of active time. This dish takes less time than you might expect. Anytime dish.

    Ingredients:

    (Serves 4 as a starter, 2 as a main course)

    • 1 large or 2 small fennel bulbs, cleaned (a few fronds reserved)
    • 6 small radishes
    • 1 tablespoon sugar
    • 1 teaspoon salt
    • 1 teaspoon rice wine vinegar
    • 1 pound fresh ahi tuna (preferably cut into a rectangle by your fish monger)
    • Kosher salt
    • Freshly ground black pepper
    • 3 tablespoons high heat cooking oil like peanut or canola
    • 1 large ruby-red grapefruit

    Continue reading

  • Golden Beet Sliders

    Golden Beet Sliders.

    Golden Beet Sliders.

    Or as a simple salad. If you don't want the bread.

    Or as a simple salad. If you don’t want the bread.

    Best to get this out upfront. This recipe is inspired by some beet sliders we saw on a rerun of Diners, Drive-ins and Dives. Yes, we love our cookbooks and yes most of our inspiration for cooking comes from the garden (and other blogs). But we still like a good burger joint or seaside clam shack, and we do occasionally indulge and watch Guy Fieri do his thing. And in this case, he visited a place called Gatsby’s in Sacramento and they featured beet sliders. We do love beets and sliders, so at some point we had to make this. And we just got some beautiful baby golden beets at the farmers market, so Carolyn made the call. Golden beet sliders for dinner.

    bslide2bslide3bslide4While we were inspired by the Gatsby’s dish, we changed the recipe substantially. We use golden and not red beets, roast rather than boil the beets and use an orange vinaigrette for the sauce instead of green goddess dressing. We also add goat cheese for tang (and some bacon and pecorino as an extra option, yum). And, of course, we use King Hawaiian rolls for the bread, simply because everyone likes them. But while we changed a lot of the dish, the fundamental idea stays the same: sweet beets are a very good substitute for beef in a burger. These sliders are good, really good. Not just a good “vegetarian dish”, but a “good dish”, period.

    bslide8bslide5bslide6The only downside of this dish is that it takes time to cook beets. There is no way around it (even if you microwave them you are looking at 25-30 minutes). Our only suggestion is that when you roast beets, roast a lot of them and put them in salads over the next 2-3 days. Otherwise, just roast the beets for 60 to 90 minutes, depending on their size. Wrapping in foil will speed things up a bit and makes for easier cleanup. When you can easily pierce the beets with a knife and the skins peel off easily, they are done.

    bslide7bslide9bslide10Once you roast and skin the beets, making the rest of the dish is easy. Make a quick vinaigrette with some orange juice and zest (oranges and beets are a great mix) and dress some bitter greens like arugula. Then season and sear the beets for a minute or two on each side. Then lightly grill or toast the buns. You assemble the sliders with a bed of the dressed greens, then add the beets, a little goat cheese, more greens and the top of the bun. Most people can easily eat 2 or 3 of these. And if you want to add even more flavor, a little bacon and some grated pecorino add some umami and salt flavors to the sweetness of the beets. Either way, it is hard to go wrong.bslide11

    bslide13bslide14 Continue reading

  • Roasted Halibut With Tarragon and Hazelnut Brown Butter

    tarra14As we noted a week or so ago, herbs are the first plants in our garden that really “pop” with the coming of spring. And while we get plenty of fresh goodies from the farmers market, there is nothing quite like getting the first taste of produce from our own garden. It sort of “hardens” the idea that spring is really here (for us, at least). Right now we have plenty of mint (cocktails on the way), marjoram and oregano, but this spring our tarragon (finally) took off. We couldn’t wait to use it.

    tarratarra1And we knew exactly how we wanted to use the tarragon, as a flavoring for roasted fish. Here in Norcal, that usually means local halibut, rock cod/rockfish or salmon. In this case we use halibut, but any firm white fish will do. As for the cooking method, you can go sous-vide (and it would be great), but we also have a relatively foolproof roasting method for fish. We simply create a bed of citrus and herbs for the fish, add the fish and then layer on a bunch of butter, salt, pepper, more herbs and more citrus. This method also works with other herbs (thyme is one of our favorites), just make sure to bruise the herbs before you layer them in, this releases the oils and gets the flavor into the dish. Then roast the fish at 350 degrees for 15-20 minutes (depending on thickness) and serve.

    tarra3tarra5So now that we had the herbs and the fish dialed, the big question was the sauce. A little internet search brought us to a tarragon and halibut recipe with a hazelnut and brown butter sauce from Bon Appetit. Nice. We adapted the recipe, particularly how we cook the fish, but also played a bit with the brown butter recipe. But the addition of the hazelnuts to the brown butter was all Bon Appetit’s, and we will certainly give credit to them for a good idea. This is a good extra touch and takes the sauce over the top.

    tarra8tarra4Not that you can go wrong with brown butter sauce. If you have butter in your fridge and 10 minutes, you have a perfect sauce waiting to happen. Brown butter is easy to make and works beautifully with pasta, fish or earthy veggies. A sauce you need in your toolkit. The key is to cook the butter at medium heat until the milk solids get brown (not black, if you get close to dark brown, stop cooking the sauce) and develop a nutty flavor and aroma. You then just add seasoning and some herbs, sage is a natural fit but tarragon also works very well.

    tarra9tarra11tarra12The last piece of the puzzle for this sauce was to add the chopped hazelnuts and a dash of lemon juice. The hazelnuts add more nutty flavor, but also some needed crunch to the dish. The lemon adds some acid and sourness to match the rich butter and fish. Overall you get sweet fish, savory brown butter and hazelnuts, earthy and herbal notes from the tarragon and acidity from the lemons that cleans the palate for the next bite. The extra bonus is that the brown butter sauce works beautifully with roasted asparagus (another spring crop), so we just roasted some asparagus spears and served them with the fish and the brown butter. Excellent, and all in less than 45 minutes. Like we said, we couldn’t wait to use our herbs…

    tarra13Roasted Halibut With Tarragon and Hazelnut Brown Butter:

    (Adapted from Bon Appetit)

    Notes Before You Start:

    • The best way to check for doneness on fish is to use a digital thermometer. We think it is the most important kitchen tool after a sharp chef’s knife. If you don’t have one, the best way to check is to cut into the fish and look. Otherwise, pull the fish from the heat just before it’s done, it will keep cooking in residual heat.
    • Many resources will say halibut needs to be cooked to 145 degrees to be “safe”, we prefer it less cooked, closer to 130-135 degrees.

    What You Get: A rich, flavorful and easy fish dinner in about 45 minutes.

    What You Need: No special equipment required, but a digital thermometer would be nice.

    How Long? About 45 minutes with 20 minutes of active time. Anytime dish.

    Continue reading

  • Easy Oven Ribs With Sriracha Barbecue Sauce

    Easy Oven Ribs With Sriracha Barbecue Sauce.

    Easy Oven Ribs With Sriracha Barbecue Sauce.

    We do love our ribs here at the farm. And, without a doubt, we love Memphis-style barbecue ribs with a dry rub, mop and slow smoking over applewood and hickory. Toss in some hot, vinegary Carolina barbecue sauce and Nirvana awaits. But we just made it into spring, the rains come and go, it’s still cold and the smoker needs to be set up (and we are tired from working in the garden). Time to turn on the oven.

    orib2oribs3And there is nothing wrong with making ribs in the oven. In fact, some would argue that it may be a better place to cook ribs, assuming you use the right tools/technique and choose the right seasoning and sauce. The one thing that is really hard to do is get the deep smokey flavor and “smoke ring” color from the oven. But you can get very flavorful, tender ribs.

    oribs5oribs6As for the tools and technique, the main thing you need is some time, sauce (we will get there) and aluminium foil. The big thing with ribs is that they need to cook low and slow and, preferably, in a moist environment so they don’t dry out. This is particularly true for baby back ribs, which don’t carry much extra fat. But if you season and sauce the ribs and then wrap in a packet of foil, you can trap the juices from the ribs and gently steam the ribs for a few hours until they reach the desired temperature of 185 F. You need the temperature to get at least to 185 so the collagen in the meat turns to gelatin (that luscious texture) and the ribs get tender. Then you open the foil packets, add some more sauce and finish the ribs under the broiler for a few minutes to get a nice crispy, caramelized crust. Easy, but like most good things, you need a few extra steps.

    oribs7oribs9And now for the sauce. Since we don’t feel we can get a southern-style smokey flavor, we look more to Asian flavors. Instead of a base of ketchup, cider vinegar, Worcestershire and hot sauce, we go with ketchup, onion, garlic, soy sauce, rice wine vinegar and Sriracha. You get a familiar texture of barbecue sauce but the more Asian-inspired notes and some heat. And you can control the heat to your liking by just adding or subtracting Sriracha and/or some red pepper flake. Good stuff and good fun.

    oribs8 Continue reading