Sous-vide cooker for the home. It works.
The more we cook, the more we understand that time and temperature are the keys to good cooking. And it has always been this way in the kitchen. For generations good cooks understood that, for many dishes, low-and-slow transforms even the lowliest ingredients into the best meals. And we use our dutch oven, slow cooker and smoker in many meals to take advantage of low-and-slow, particularly for larger, tougher cuts of meat. We do like our beef brisket and pork shoulder.

Temperature-controlled water bath with racks to manage space.
But when cooking steaks, chicken pieces or fish, the slow cooker or smoker are usually not practical options. Most of these meats are fried, seared or roasted in the pan and/or oven, or grilled on the barbecue. The problem with these high-heat methods is that the heat is applied unevenly on the meat. So even with good technique you get a well-done exterior that moves towards the desired doneness in the center of the meat (assuming you don’t overcook the whole thing). The only real bonus of high-heat cooking is the extra flavor you get from browning / caramelizing. Most traditional cooking methods can’t fully overcome a fundamental challenge- how do we cook and brown this irregularly shaped food without overcooking it?

Grass-fed ribeye steaks. These are real good- best not to screw it up.
Sous-vide (French for “under vacuum”) cooking is a solution to this challenge. Basically a slow-cooker for individual cuts of meat, fish and poultry, sous-vide cooking gives the home cook exact control of cooking temperature that’s applied uniformly to the meat. And it works pretty much every time- as long as you have the time. The approach here is pretty simple, a water bath is heated to a specific temperature and the protein (or vegetable) is vacuum-sealed into a bag and the bag is placed in the water. The bag keeps the meat from leaking juices or breaking apart into the water bath. The proteins slowly, and uniformly, cook to the temperature in the water bath. Once done, the protein can be briefly seared to add the tasty browned flavors and improve appearance. It is a neat trick and it really works. If you ever wonder how busy high-end restaurants get their steaks or fish right every time, sous-vide is often the answer.

Vacuum-sealing the steaks. This takes less than a minute.
We’ve been reading Stefan’s Gourmet Blog and his results cooking sous-vide always looked great. And as we recently purchased 1/4 of a grass-fed cow from Stemple Creek Ranch, we wanted a cooking method that made the most of the flavor of the beef. So we took the plunge and bought a sous-vide cooker (we got one on sale, but expect the setup to run somewhere between $350 – $500, so it’s not cheap). So far we have tried cooking halibut, salmon and Stefan’s cod recipe. All were perfectly cooked.

Cook for 1.5 – 2 hours at 125 degrees.
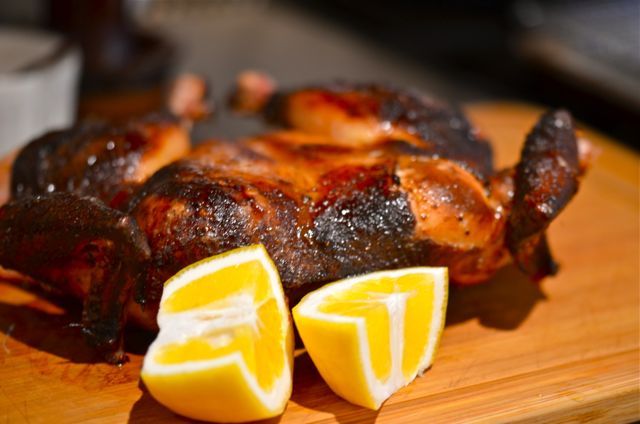
The next thing we tried was making a good steak using sous-vide. Not ones to be cautious, we went right to making ribeye steaks. We followed the new procedure, sous-vide cook at desired temperature (in this case 125 degrees for rare-to – medium rare) for 2 hours and then sear the meat briefly to brown the surface. Frankly, the meat, while perfectly cooked, is very unattractive unless you brown it. You can use a hot skillet, grill or even a blowtorch, but we just went with a rocket-hot cast-iron skillet. This browning method worked with just 30-45 seconds of searing on each side. Then we rested the meat for a few minutes and cut it into slices to serve. The first thing we noticed was that the meat was seared on the outside but then the same pink color all the way through, no gray layer, just perfectly cooked meat. So we found the sous-vide approach to cooking steaks was a real success, as long as you have the extra time. Our standard cooking method is here, and that takes 20 minutes. But with expensive, high-quality steaks, we think the extra time is worth it. And if you are entertaining, you can hold the meat at the perfect temperature and then sear just before serving, so sous-vide is a good tool when cooking for a group. Continue reading →
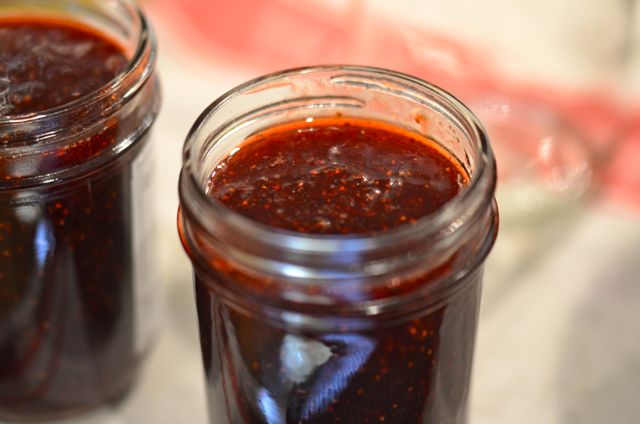
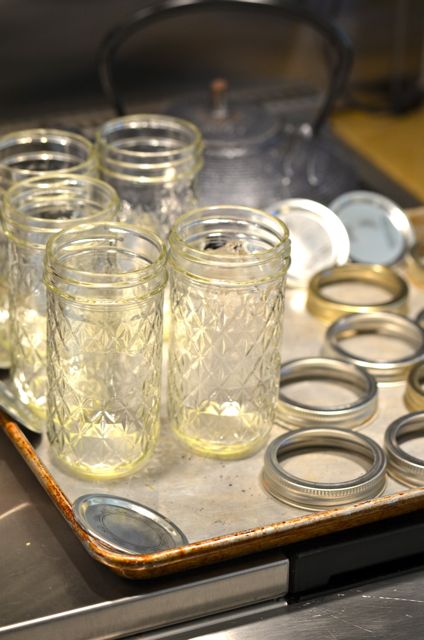
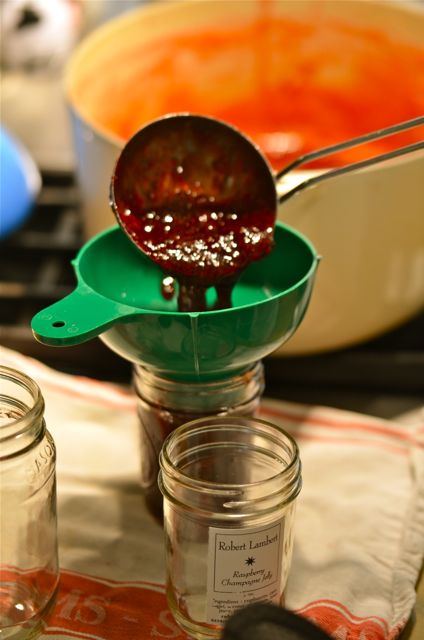
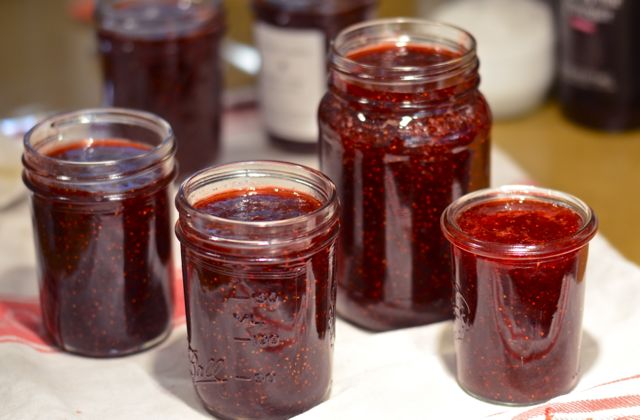 So what makes this strawberry jam the best? Well, it is just strawberries, sugar and lemon juice, so nothing gets in the way. If you have ripe, sweet strawberries, this is the real deal. And we use a technique that makes the process much, much easier. If you like jam, but don’t like all the specialized gear and the huge tub of boiling water, we have a solution: the oven.
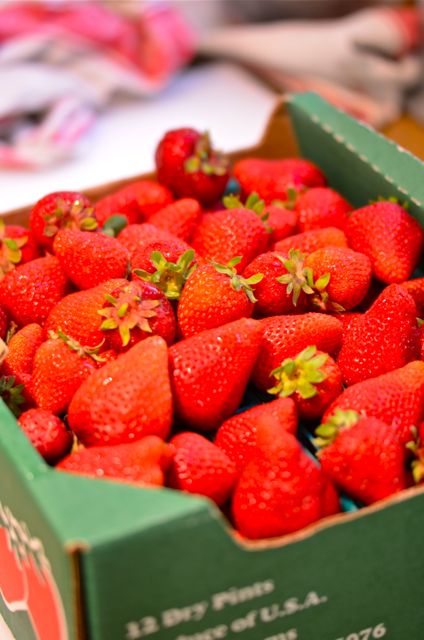 It turns out you can sterilize your jars and lids in the oven, You can process the jam, too. (Just make sure your oven is true to temperature, they often are NOT, use an oven thermometer to be sure). Simply place your clean jars and lids on a baking sheet and heat in a 250 degree oven for at least 30 minutes. Remove the jars from the oven when you need them. Then fill the jars with jam, leave a 1/4 inch of room, wipe the rims clean, place the lids on, seal them and put the jars back in the oven for 15 minutes. Then take the jars out of the oven and they will seal as they cool. So. Much. Easier.
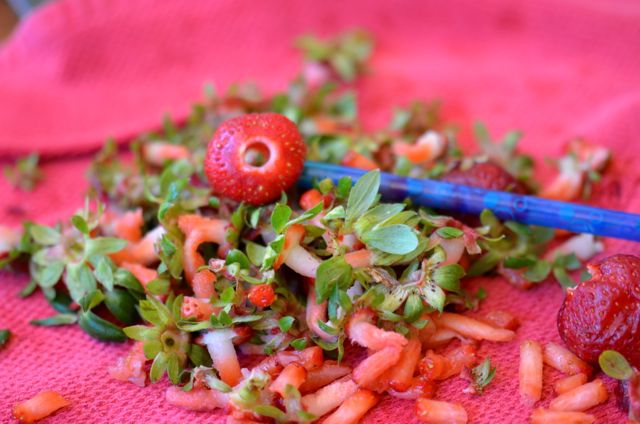
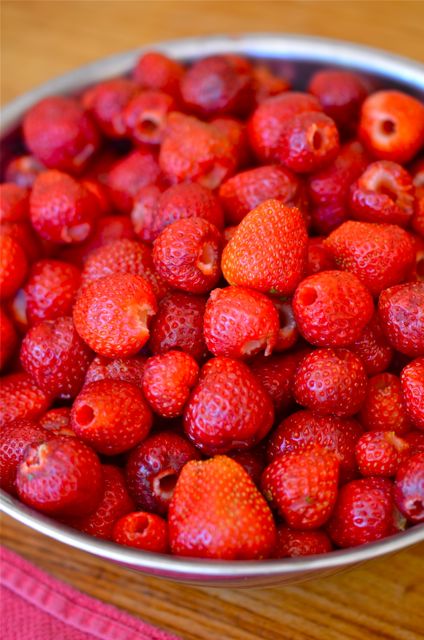 The other fuss about making jam usually has to do w/ pitting and skinning fruit, or in the case of strawberries, hulling. There are specialized hulling tools, but we use strong plastic straws (flimsy won’t work here) and run them from the bottom through the center of the strawberries. It is the fastest way to hull the strawberries, and something anyone (read, your kids or guest) can
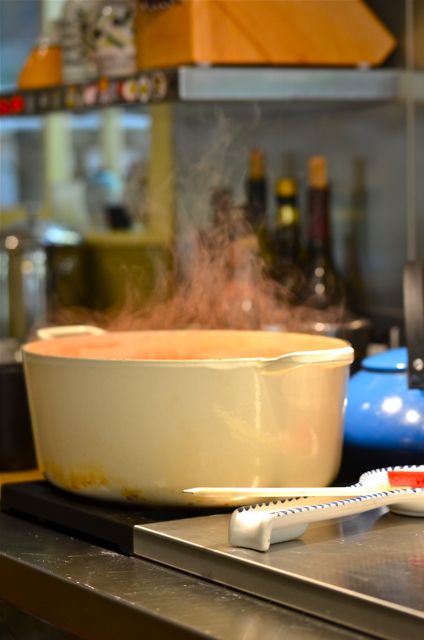
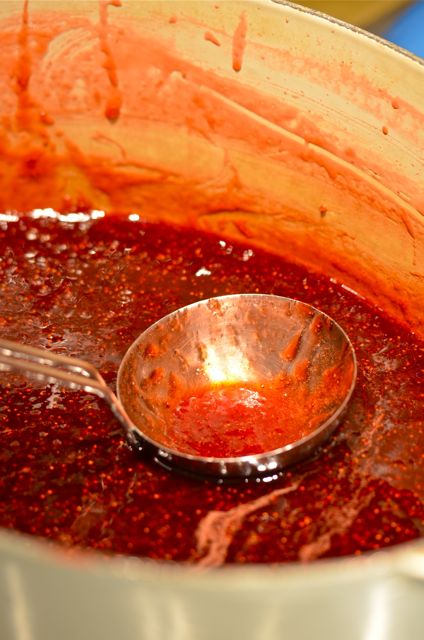 As for the jam, we adapted the recipe (and the oven technique) from Blue Chair Fruit Company in Berkeley. Blue Chair has fine jams and marmalade, gear, classes and one of our favorite cookbooks. Worth a visit.