• Holiday Leftover Hash: Something Good For Black Friday

    hashhash4We thought about doing a Thanksgiving turkey recipe for the blog, but truth be told, we aren’t big turkey people. We will be making J. Kenji Lopez-Alt’s Sous Vide “Turchetta” (turkey breast made like Porchetta) and a beef roast for the Thanksgivukkah holiday. But we will give you an awesome, and easy, recipe to use up those Thanksgiving leftovers- hash. We suggest you forgo the shopping and serve hash for Black Friday Brunch.

    hash5hash6hash7
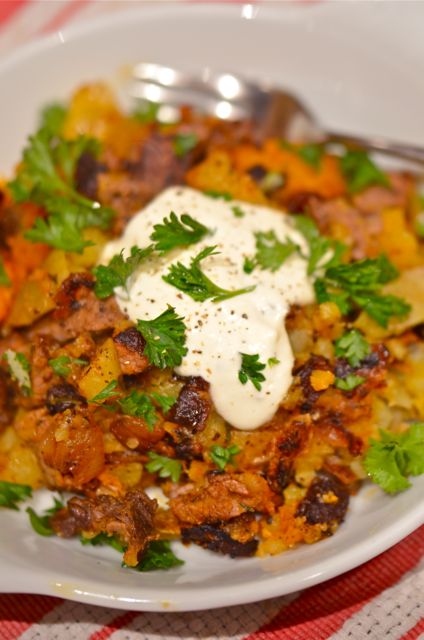
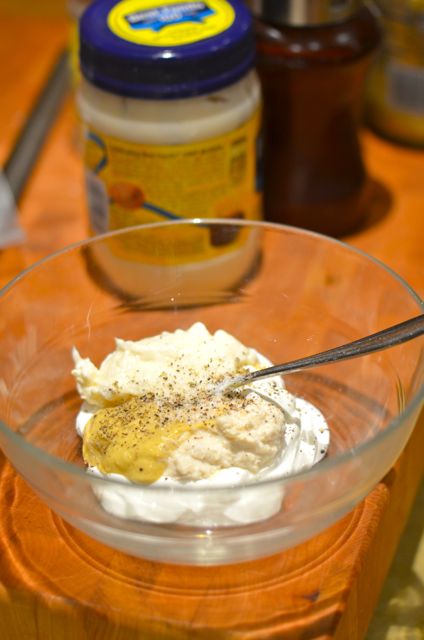
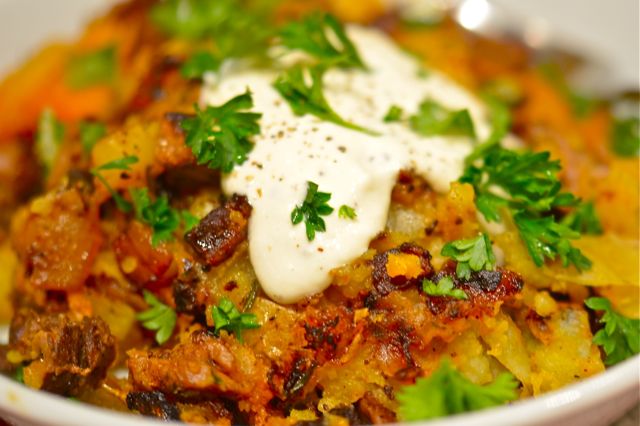
We like turkey or ham sandwiches just fine, but when you can take the leftover turkey/pork/beef, potatoes and veggies, add some seasoning and crisp them up in some bacon fat…well now you are onto something. And that is the beauty of hash. A good hash elevates your leftovers into an entirely new dish, and since most of the ingredients are cooked, it doesn’t take that long or require many pot and pans. Nice. And if you just “happen” to top off the hash with a fried egg or a zippy horseradish sauce…well then you really will have something to be thankful for.

    hash8hash9
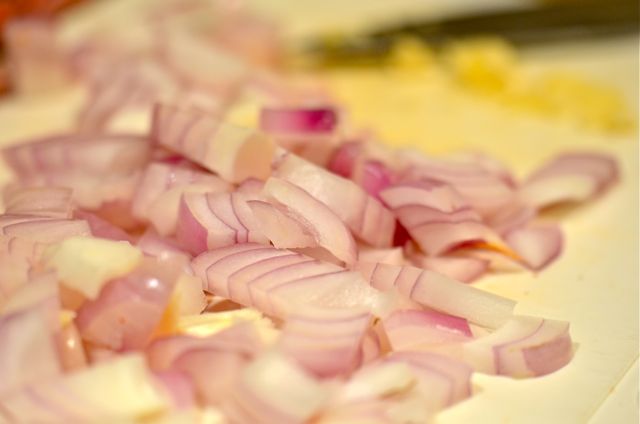
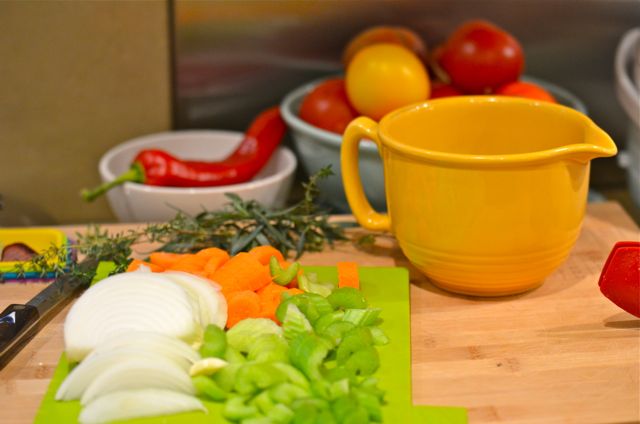
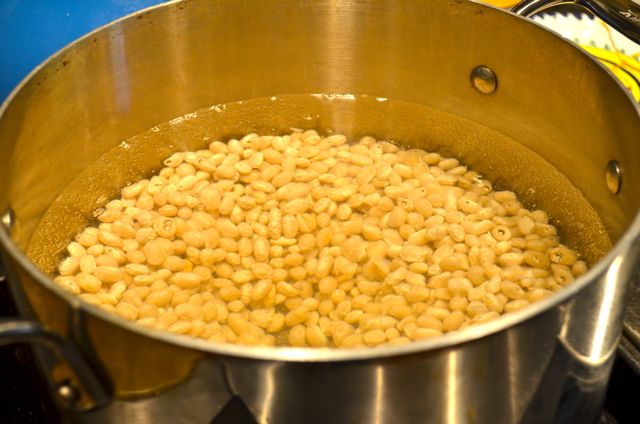
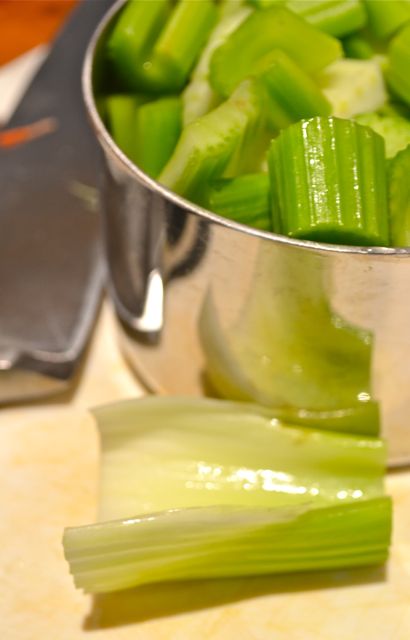
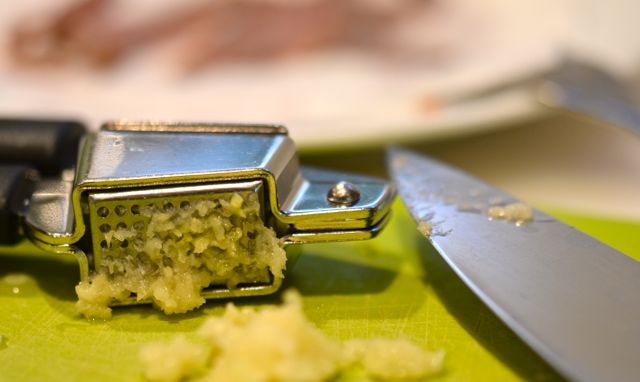
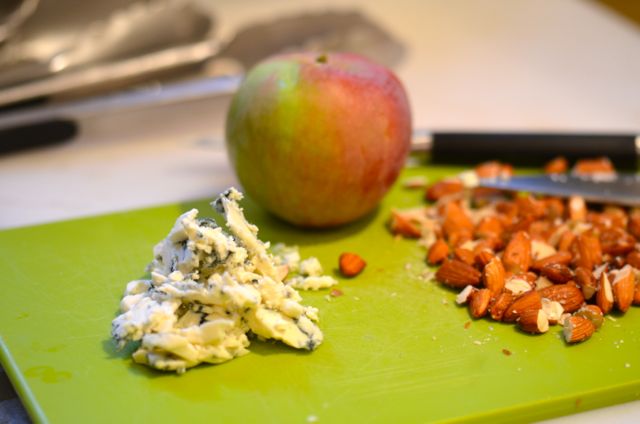
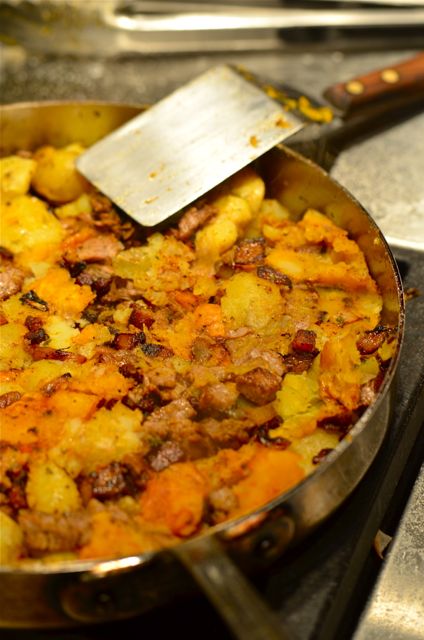
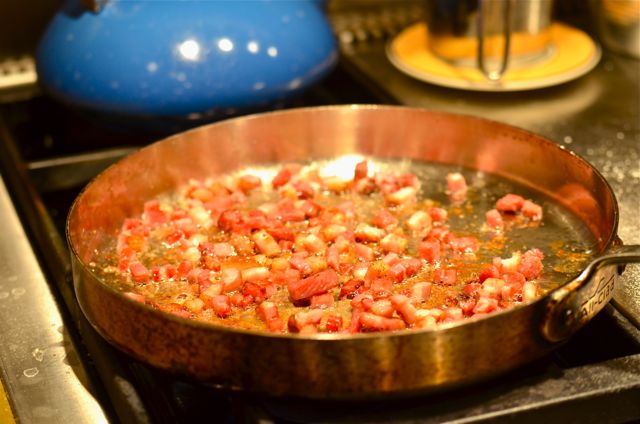
The key with making hash is to use what you already have and balance flavors and textures. Think about a mix of savory, sweet, vegetal and spicy flavors and soft, creamy and crispy textures (the browning will crisp up the dish). Pretty much any leftover you have may be worth adding, so be creative. And pre-cooked food is better in hash, as you don’t have to worry about even cooking of various raw ingredients. The only “fresh” ingredients we use are bacon, (to get its fat) onions and minced garlic we soften in the grease before adding the other ingredients. We top the hash with either a fried egg or a quick horseradish sauce (prepared horseradish, sour cream, mayonnaise, a touch of mustard, salt/pepper) but steak sauce or simple ketchup are just fine as well.

    hash10hash12hash14
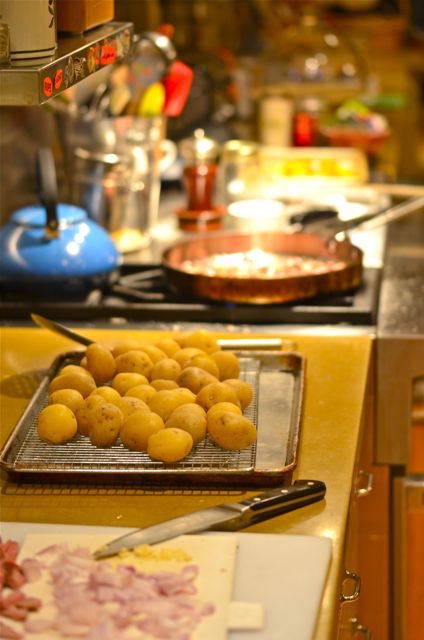
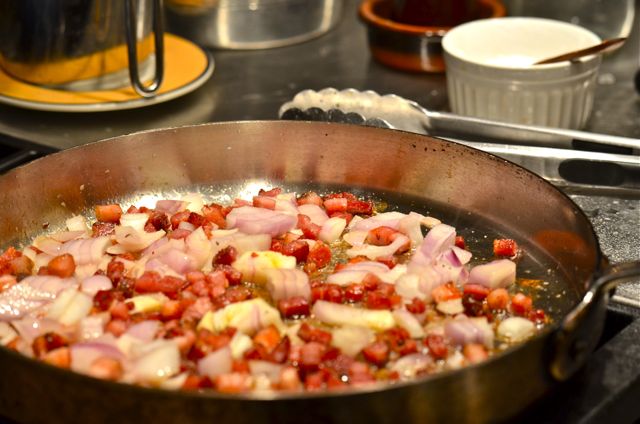
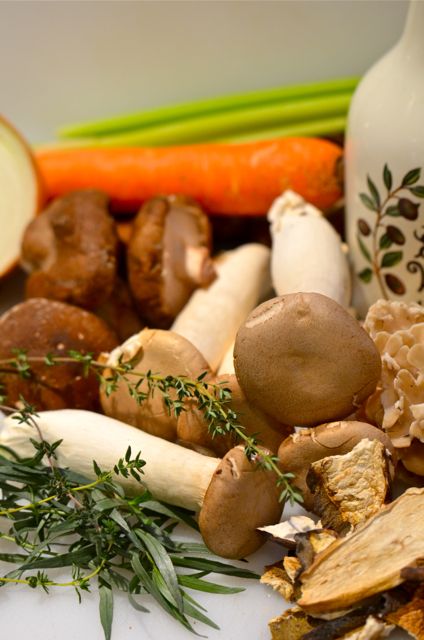
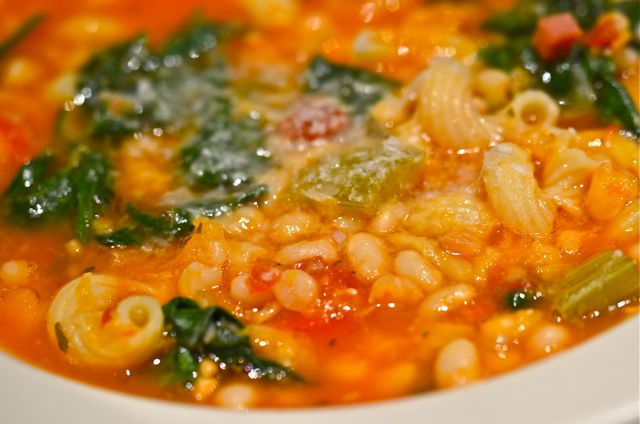
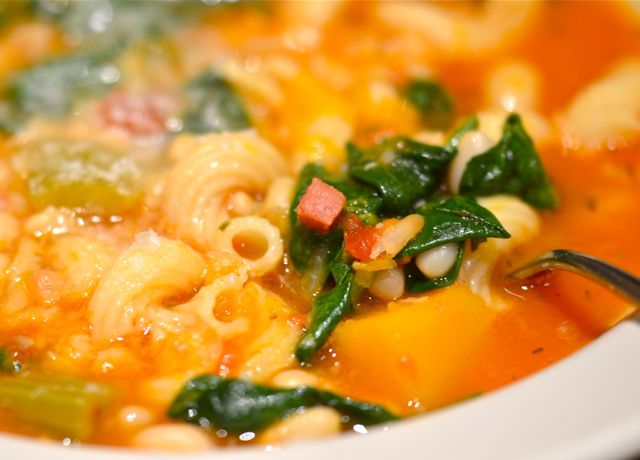
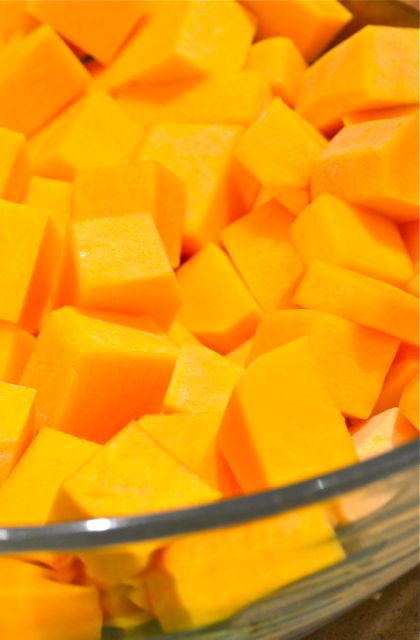
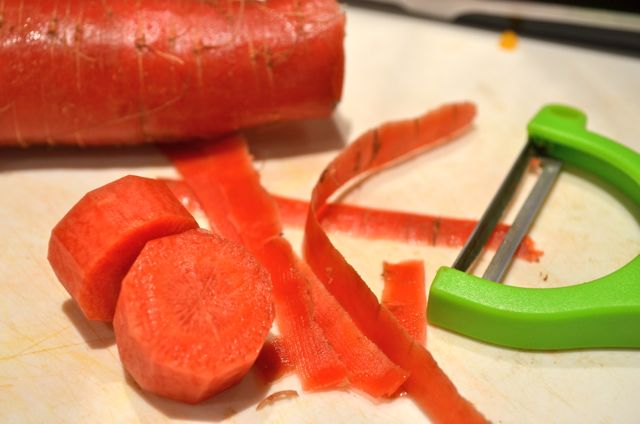
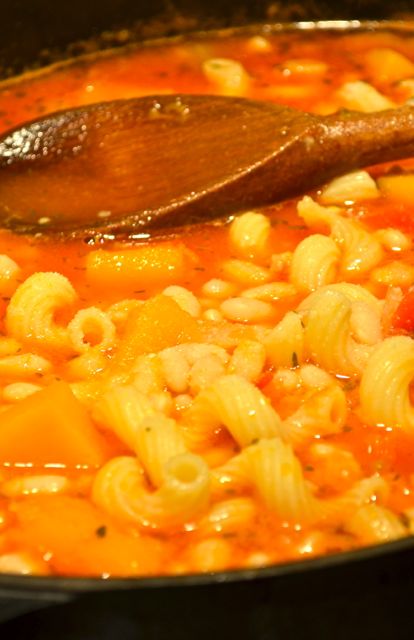
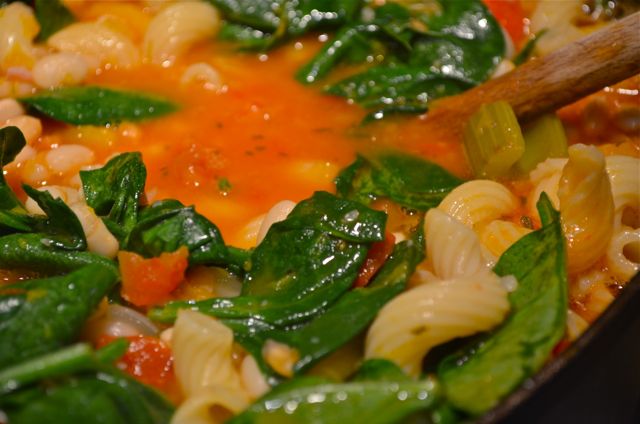
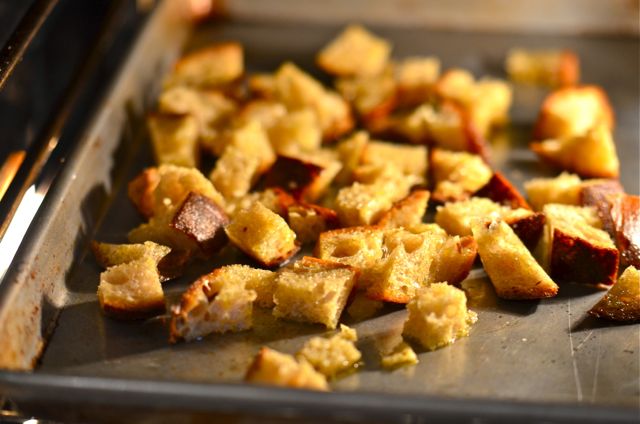
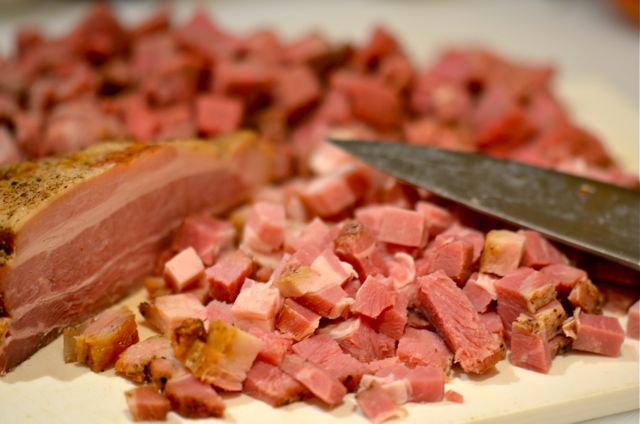
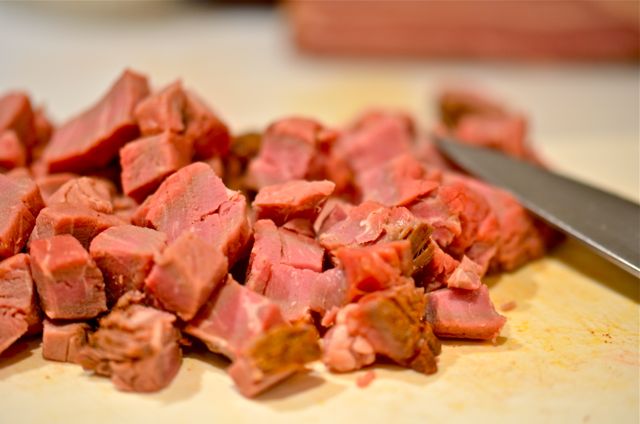
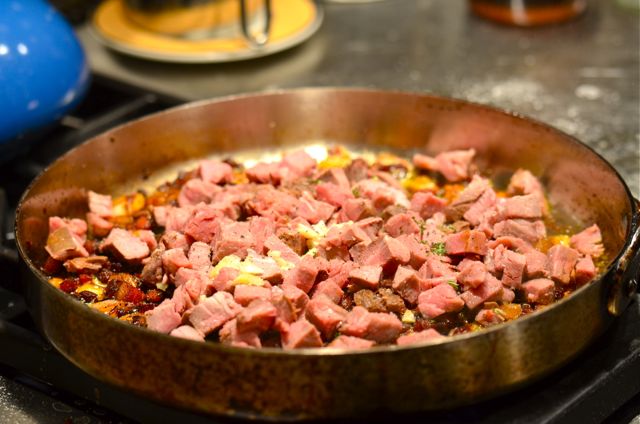
For this hash we used leftover beef, roasted butternut squash and boiled Yukon Gold potatoes seasoned with a bit of thyme, cumin and chili powder. It was great. But if we had leftover turkey, sweet potatoes, mashers or even creamed spinach or roasted brussels sprouts, we could use them (most stuffings will also work). Hard to go wrong here, as long as you liked the dish on Thursday, it probably work in hash on Friday….except for the cranberry sauce, best to keep that out of the hash.

    hash15hash13So we wish you a Happy Thanksgiving! We hope you cook your turkey in pieces (trust us!), have a few fun cocktails and enjoy time with family and friends. We also hope you stay home on Friday, maybe build a fire, and cook this hash for brunch. Enjoy the day…the “holidaze” are coming.

    hash2

    Holiday Leftover Hash:

    Notes Before You Start:

    • The best way to make hash is to mostly use cooked leftovers. Raw ingredients have different cooking times and can mess up your hash. We suggest just a few softened aromatics and then whatever leftovers you have.
    • Cooking in a cast iron pan or steel skillet will get you the best browning and a crispy, delicious hash.

    What You Get: An easy, delicious and warm dish using up those Thanksgiving leftovers.

    What You Need: No special equipment required.

    How Long? About 25-30 minutes. A few minutes of chopping, otherwise this is as easy as it gets. Anytime dish.

    Continue reading

  • Mushroom Ragout With Fried Duck Eggs

    Mushroom Ragout with Fried Duck Eggs.

    Mushroom Ragout with Fried Duck Eggs.

    Happy Halloween! Go Sox! And way to go Koji! My kids have a new favorite (non-Giant) player. What a Series…now back to business.

    Most of the time when we blog about a dish it was a success. We make plenty of good, average or just “meh” dishes that don’t merit sharing, or at least need some serious tuning before we unleash them on the blogosphere. Over time, we’ve become a very self-critical bunch (the kids can’t help it, if they don’t like something it is very clear). This is a good thing, a little truthful feedback goes a long way, and we continue to improve as cooks. However, this means the bar for a dish to be “blogworthy” grows ever higher.

    shroom4shroom5So while we are sharing this dish, we will say up front that it may or may not be worth the work (it depends on how much you like mushrooms). But we will share the recipe because one of the major components of the dish really did sing, and we will use it again. That part is porcini mushroom stock. With Thanksgiving coming up, we will use this stock for a number of dishes- and they will rock. Someone is bound to say that “this gravy goes to eleven”….;-)

    shroom6shroom7shroom8And the porcini stock did help with this adaptation of a Yotam Ottolenghi recipe. Basically a deconstructed / modernized Stroganoff, this dish combines browned mushrooms, garlicky croutons and a sauce of porcini stock and sour cream. Topped with a poached or fried duck egg (we like to fry the eggs, your choice), you get a rich, flavorful dish with a range of textures. Good, but a bit of a fuss for what ends up in the bowl.

    shroom9shroom10The fuss here is that you have to soak dried porcini for the stock, then make your own croutons (good but 15 minutes), brown the mushrooms in batches (better browning, but a pain in the a**), make and reduce the porcini stock, fry the eggs, finish the sauce and serve. A simple dish made not so simple- Ottolenghi does this to you sometimes. And sometimes it’s worth it and sometimes…..not so much. Such is life.

    shroom12shroom13shroom14But we did get the Porcini stock, and that made everything worthwhile. All you do is soak 1/2 ounce of dried porcini in a cup of hot water for 30 minutes, strain the liquid (discard the porcini), add some water, mirepoix, thyme and a bit of seasoning. Simmer for about 20 minutes and then adjust seasoning. What you get is a balanced, sweet and flavorful stock with clear umami notes. This stuff beats any veggie stock and is better than most chicken or beef stock. And it takes a lot less time to make than most homemade stock.

    shroom15 Continue reading

  • (Mostly) Easy Minestrone

    Easy Minestrone.

    Easy Minestrone.

    mine1mine2Seeing as how we grow a lot of our own produce we should know better than to simply judge produce on its appearance. In fact, often the best tasting fruits and veggies are downright ugly, and certainly not the stuff you would see on supermarket shelves. But both in our garden and at the farmers market we are still suckers for a pretty face. Happily, these days you can get both good-looking and good tasting produce. Such is the case with some colorful red carrots we bought at the farmers market. Beautiful, crunchy and sweet…we got a bunch.

    mine4So here we are back with our common challenge, “what do we do with all these carrots?” Well, with carrots we either eat them raw with a pinch of salt (never gets old), or we are making soup. Seeing as how salted carrots doesn’t make up much of a blog post, we went for soup. If we had any pork stock or ham hocks we would make “holiday hangover soup” or a garbure, but we don’t. We did have chicken stock and some left over pasta. Yup…time for Minestrone.

    mine5mine6We won’t get into the history of Minestrone and we aren’t even sure there is a truly “traditional” recipe. But if you have some veggies, chicken or vegetable stock and some pasta, you can cobble together a decent Minestrone. Add a little cured pork, maybe some white beans, fresh herbs and simmer with a parmesan rind and you get something that gets pretty darn good. And feeds an army.

    mine7mine8The recipe we use is a riff on a riff on a riff of an Ina Garten “Winter Minestrone” recipe, which itself is a riff on a very common formula. We change the recipe quite a bit, but we do use the same slate of winter vegetables, particularly some butternut squash that adds very nice sweet flavor to the soup along with a bit of spinach at the end that adds color and welcome bitter notes. We also use more cured pork (of course) dried beans we soak (yes, it is worth it), fresh herbs and the parmesan rind. Lots of flavor and not a lot of work other than chopping veggies.

    mine9What you do need here is time. Chopping the veggies takes a while. Soaking beans (either a long or quick soak) requires some planning and advance work. And cooking the soup takes at least an hour. Basically this is a weekend dish. The good news is that, as is often the case with this type of soup, the Minestrone is better the next day. So you can make a batch on Sunday and serve it for dinner and then have the Minestrone as a very tasty lunch or light supper later in the week. A pretty good deal and a very good way to use of some of those lovely veggies you get at the market…or from your garden.

    mine10Easy Minestrone:

    (Adapted, somewhat, from Ina Garten)

    Notes before you start:

    • You can use canned white beans but we heavily suggest rehydrating and cooking dried white beans. The simply taste better.
    • You can soak beans overnight (better) or quick soak the beans- just cover the beans with water, bring the water almost to a boil and then turn off the heat. Let the beans steep, covered, for an hour and then cook.

    What You Get: Very tasty and healthy soup that will last for a few days.

    What You Need: No special equipment required, just be ready to chop some veggies.

    How Long? At least a few hours, mostly inactive other than chopping. Budget time to soak the beans.

    Ingredients:

    (Makes 8 big servings)

    • 1 pound dried white or cannellini beans (soaked overnight or quick-soaked)
    • Olive oil
    • 6 ounces pancetta or bacon, diced
    • 1 1/2 cups yellow onions, diced (diced= roughly 1/2 inch pieces)
    • 2 cups carrots, peeled and diced
    • 2 cups celery, diced
    • 2 1/2 cups butternut squash, peeled and diced
    • 1 1/2 tablespoons minced garlic (about 3 large cloves)
    • 2 teaspoons chopped fresh thyme leaves
    • 1 teaspoon chopped fresh marjoram or oregano (optional)
    • 1 (26-ounce) can or box diced tomatoes
    • 1 pinch red pepper flakes (optional)
    • 1 parmesan rind (optional)
    • 6 to 8 cups chicken stock
    • 1 bay leaf
    • Salt and freshly ground black pepper
    • 2 cups cooked small pasta
    • 8 to 10 ounces fresh baby spinach leaves
    • Parmesan and/or Romano cheese for garnish
    • Italian parsley, for garnish

    Continue reading

  • Attempting The Zuni Caesar Salad

    Zuni Caesar Salad.

    Zuni Caesar Salad.

    There are few more iconic dishes in the San Francisco Bay Area than the Zuni Caesar Salad. The Caesar Salad may come in and out of style, and heaven knows there are some truly criminal insipid versions out there, but here in Norcal it is still a dish that puts butts in seats at the best restaurants (and the best homes….or farms). And while there may be better versions out there to discover, we make an (almost) annual pilgrimage to Judy Rodger’s Zuni Cafe to get our Caesar Salad….and it is still amazing.

    zuni2zuni3zuni4And a good Caesar Salad is a true masterpiece. Crunch from the romaine and croutons, a rich but acidic dressing and a big dose of umami from anchovy and parmesan combine into true alchemy, a dish that is more than the sum of its parts. But oddly enough, we don’t make many Caesars here at the farm. We weren’t sure why, but we decided to remedy the situation and try to make Caesars at home. And since the Zuni Cafe Cookbook is one of our favorites, we just had to open it up and give the “best” Caesar recipe a try. Easy enough.

    zuni5zuni6zuni7Except that it isn’t really easy at all. The recipe itself is very simple. Judy Rodgers has no tricks that a good home cook wouldn’t know or couldn’t follow. She just gives you solid technique and a list of common ingredients (and the Caesar is made from readily available ingredients). But that is what makes it hard. There is no place to hide. Like many classic dishes (think Caprese Salad) there is no way to mask inferior ingredients or shoddy work. You need to find the best ingredients and then do everything to make them shine. No shortcuts, no appliances, no pre-made, no pre-grated, to pre-peeled, no pre-washed and no making things ahead of time. Just manual labor at the time of service. This salad is real work. But good work.

    zuni10zuni8zuni9So is it worth it? Hell yes. Was ours as good as Zuni’s? Hell no…but damn good, nonetheless. And better than almost any other restaurant version we’ve had. We will make this at home much more often, even with the extra effort. But here are our key takeaways: homemade croutons from good artisan bread are a must (we knew this, but for a Caesar even more important), you need fresh garlic with no bitter green shoots, be very picky with the romaine and take only the best pieces, wash the romaine and then totally dry the leaves (bone dry, seriously, take the extra two minutes and dry those greens), and be very generous with the parmesan….that may be real key.

    zuni11zuni12zuni13And the parmesan really is the key (IMHO). You need good anchovies (salted are better but quality, well-drained oil-packed anchovies will work). You can’t do without good olive oil, vinegar, lemon juice or fresh eggs for the dressing. But in the end, this recipe is a crunchy parmesan delivery service. You must use the real thing, and three ounces of grated Parmigiano-Reggiano is a lot, but the genius of the recipe is that even when a bunch of the parm sticks to the bowl (and it will) there is enough to coat almost every leaf and crouton. So you get alternating bites of bread with parmesan and then romaine with parmesan, or a combination. Think about that….yes, think about that. Uh-huh, we thought so…hard to do better. Continue reading

  • Singapore Shrimp Satay (Satay Udang)

    Singapore Shrimp Satay (Satay Udang)

    Singapore Shrimp Satay (Satay Udang)

    It may be “Labor” Day weekend, but when summer is coming to a close the last thing we want to do is heavy work in the kitchen. Nope, we want quick, easy and tasty dishes for the grill. We want to maximize our outside time with friends, eat good food and perhaps enjoy a few tasty beverages (and whine that real live starts again). But what if we want to go beyond the standard burgers and hot dogs? Enter satay, the Southeast Asian staple of some kind of protein on a stick cooked over a hot fire. Meat..Stick.. Fire….Yumm….More????

    satay

    Mix one of these before you get started.

    Mix one of these before you get started.

    We aren’t sure were we first tried this dish, also called Satay Udang, but it was one of those dishes were we immediately said, “we gotta make this at home”. There are all sorts of shrimp satay, but this version uses a sweet and spicy marinade most often associated with Singapore street food, and if you say “Singapore”and “street food” you will get our immediate culinary attention. (FYI, Singapore created food courts just for street food vendors to control sanitation…..and just maybe tax revenue.)

    satay11satay10satay9The key to this dish is a spicy marinade with aromatics, coconut milk, hot peppers and a surprise element of crushed macadamia nuts. The nuts are ground so they don’t add crunch, but they do lend a surprising richness to the shrimp that augments the coconut milk. The other slight surprise is a four-hour marinating time, as most fish marinades are under an hour, but in this case the shrimp handle the marinade just fine.

    satay8satay7We found this recipe at Saveur but did make a few changes. Firstly the original recipe calls for three Thai Bird chiles. Thai’s run at 50k to 100k Scoville units and are very hot. If you like spice, but don’t love it, we suggest Cayennes at about 30k or Serranos at 15k. These peppers are still spicy and taste great, but won’t blow your head off. (As it is, don’t breathe too deeply or touch your eyes while making the marinade…trust us on this one.) Secondly, we added some extra coconut milk to mellow the spice a bit more, but you can add less if you like.

    satay6satay4Otherwise, putting this dish together is easy. Process the aromatics and peppers, cook them with the coconut milk, chill the mixture, add the shrimp and marinate for 4 hours. Then skewer the shrimp and cook over a hot fire. The cooking mellows the heat of the chiles and what you get are beautiful charred shrimp with a perfect mix of sweet and spice with just a bit of crunch. Good stuff and a nice change of pace for the holiday. Have fun this weekend!

    satay1Singapore Shrimp Satay (Satay Udang):

    (Adapted from Saveur)

    Notes Before You Start:

    • The size and heat of chiles vary. Thai Bird chiles tend to be small, Serranos medium and Cayennes larger. The original recipe wants three Thai chiles, we used one Cayenne and would suggest two Serranos. Err on the side of less spice, you can always add it later.
    • The recipe also calls for Kaffir lime leaves. If you don’t have the leaves, the zest of a few limes can substitute.

    What You Get: Very flavorful shrimp that work as a snack, with rice or in tacos.

    What You Need: A hot fire.

    How Long? About 4 and a half hours, but only about 15 minutes of active time. The only thing you have to do is wait on the marinade. Weekend dish.

    Continue reading

  • House-Smoked Almonds (And A California Salad)

    almond

    House-Smoked Almonds.

    almond1

    California Salad.

    Summer is drawing to a close here at the farm. Not so much the weather, it will be warm and sunny for a while, but the kids are returning to school and things start to get busy again. We would like to say that without the rest of the year we wouldn’t enjoy summer as much, but that is just a lie. We like our “slow” time with the kids, friends and family. It doesn’t ever get old. But such is life…the rest of the year arrives whether we like it or not.

    almond4almond3Meanwhile, we do have a few more summer cooking projects to tackle and have worked hard to fit them in. The first was trying sous-vide, deep-fried, all-belly porchetta from j.Kenji Lopez-Alt at Serious Eats (recipe here). It was simply AWESOME, but so rich we will save it for special occasions. Sad to say, no photos, there was a lot going on and when we deep fry we prefer not to be distracted by taking pictures (it’s that hot oil and fire thing). But now that we made the dish, you may see a post for this recipe around the holidays.

    almond5almond6The other, easier, project was smoking our own almonds for snacking and adding to salads. This is something that is just as awesome, even if it seems a bit more umm…normal pedestrian. Smoking your own almonds over fruit woods (with just a touch of hickory) gives you a light smoke flavor, with clear fruity notes that takes the almonds to another level. Finished with a touch of fine salt and olive oil, you have an almost perfect snack with multiple flavors and a delightful crunchy texture. And these are nothing like the heavy salt/fake smoked almonds you buy in a can. These are better in every way. Hard. To. Stop. Eating. Them….Must. Stop. Eating. Them….. 😉

    almond7And smoking your own almonds is incredibly easy, it just takes time and a bit of gear. For the gear you need a stove top or outdoor smoker, but any rig you have for smoking meat will work. You also need a cheap, disposable aluminum pan with holes poked in it to hold the almonds but still let smoke through. For wood, we heavily suggest a mix of 90% fruit wood (apple or cherry) and 10% hickory. The fruit wood is sweeter and the touch of hickory gives that slight “bacony” flavor without overwhelming the almonds.Then smoke the almonds at 225 degrees F for 30 to 120 minutes, depending on your taste (and you can taste during smoking). We went about 80 minutes and thought the flavor had good balance. One note is that the smoke favor will strengthen a bit as the almonds cool, so we suggest you take the almonds out just before you think they have enough smoke flavor.

    almond8While the almonds were warm, we added a touch of fine salt and some olive oil just to coat the nuts. We went about 1 teaspoon of salt and 2 teaspoons of oil to coat 1 pound of nuts, but we suggest you slowly mix and taste as you go, it is all part of the fun. You could add other seasonings or even a touch of citrus zest, if you like. Then let the almonds cool and have at them.

    almond9How to serve the almonds? As a snack is the obvious choice, but smoked almonds truly sing in salads. The sweet, salty, smoky and crunchy notes of the almonds bring almost any greens to life. We like a simple salad of sweet greens, chopped smoked almonds, diced apples and blue cheese with a simple vinaigrette. And since we have both Macintosh and Gravenstein apples ready in the orchard, we got to use our own apples in the salad. We made a “California-grown” theme of it and used local greens (we ate all of ours from the garden already) and blue cheese (Point Reyes Blue) along with the apples and almonds. Delightful, and it could almost compete with the porchetta…almost. But it was a good complement, and we will certainly enjoy this salad more often.

    almond2House Smoked Almonds:

    Notes Before You Start:

    • You want to smoke raw, unsalted almonds if you have access to them. But you can smoke roasted and salted almonds, just smoke for less time and do not add much seasoning.
    • You can experiment with other woods like oak for smoking, but almost all resources suggest using mostly fruit woods to keep the smoke from smothering the sweet almond flavor.

    What You Get: The best almonds you’ve ever had.

    What You Need: An indoor or outdoor smoking setup. A cheap aluminum pan.

    How Long? 2-3 hours, with 20 minutes of active time. Weekend dish, but the almonds keep for a while and can be enjoyed any time.

    Ingredients:

    • 1 pound raw, unsalted almonds
    • Fine salt
    • Olive oil
    • Fruit wood and hickory chips or chunks, for smoking

    Assemble:

    1. Soak your wood chips for at least 30 minutes. Set up your smoker to smoke at 225 degrees. Add the wood chips.
    2. Take a medium aluminum pan and poke holes in the bottom. Place the almonds in the pan and then put the pan in the smoker. Smoke the almonds for 30 to 120 minutes, tasting after 30 minutes. Remove the almonds from the smoker when you get to the desired smoke flavor.
    3. While still warm, place the almonds in a bowl and slowly add the oil and salt, mixing and tasting as you go. When you reach the desired level of salt let the almonds cool and serve.

    California Salad:

    Ingredients:

    (Serves 6-8 as a side salad)

    Salad:

    • 2 heads sweet green lettuce like green-leaf, mache or butter lettuce
    • 1 cup chopped sweet / tart apples like Macintosh
    • 1/2 cup chopped house-smoked almonds (recipe above)
    • 1/4 cup blue cheese, crumbled
    • Kosher salt and black pepper, to taste

    Vinaigrette:

    • 2 tablespoons olive oil
    • 2 teaspoons red wine or sherry vinegar
    • 1 teaspoon Dijon mustard
    • Kosher salt and black pepper, to taste

    Assemble:

    1. For the vinaigrette, combine all ingredients in a medium bowl and whisk until combined. Taste and adjust oil, vinegar and seasoning. Set aside.
    2. Wash the greens and make sure they are completely dry. Tear the greens into small pieces and them place in a large salad bowl. Dress the greens with half of the vinaigrette and add more as needed. Season with salt and pepper.
    3. To finish the salad, place the dressed greens on plates and top with a mix of the almonds, apples and blue cheese. Serve.