• Cauliflower and Broccoli Salad With Hazelnuts and Pecorino

    romescoromesco14While we sometimes 
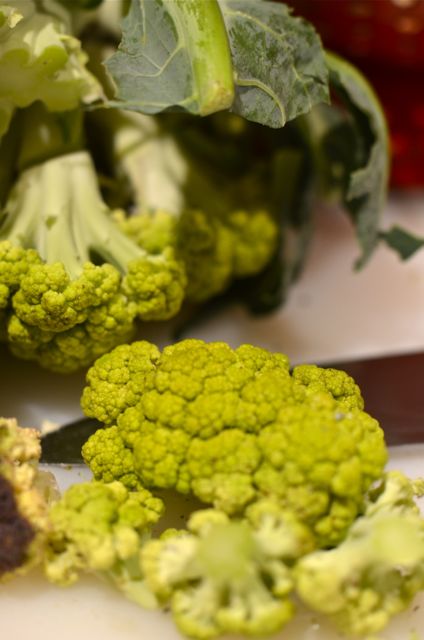
bitch and moan whine about winter vegetables this time of year, we do enjoy them quite a bit. It just takes a little more work to get the best out of them, and being as lazy as the next guy, we prefer more flavor and less work. In summer we put most fresh veggies on a plate with some olive oil and salt, or give them a quick sauté and voilà! Perfection (well, at least a good dish). In winter, we break out our thinking caps and some cookbooks and get to work. So when Carolyn brought home some purple broccoli and broccoflower (or romanesco, depending on appearance), we got off our butts motivated and made this salad. And it turned out well enough to make the blog, and become a regular dish here at the farm.

    romesco2romesco3
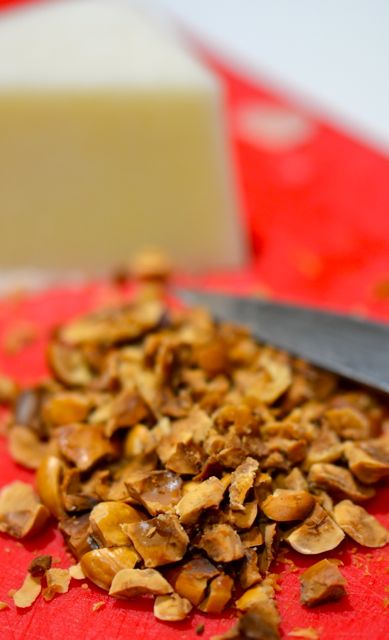
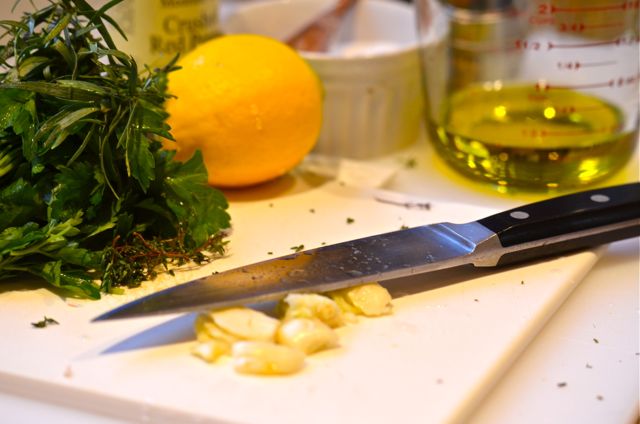
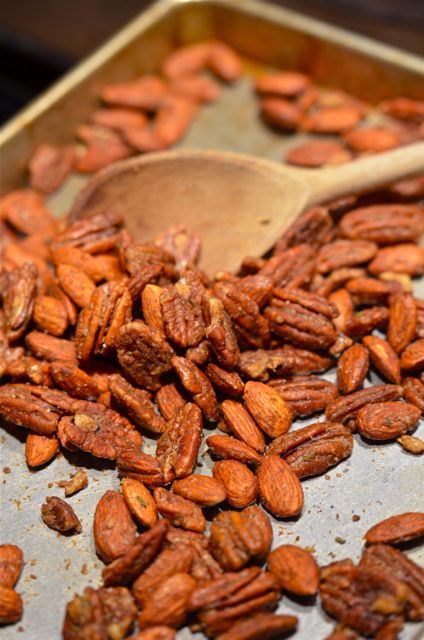
This salad combines blanched cauliflower and broccoli with sharp pecorino cheese, crisp apples, hazelnuts and bacon (optional) with a classic vinaigrette. Our goal was to build a dish that covers multiple flavors and textures but still highlights the inherent sweetness and crunch of the vegetables. The broccoli and cauliflower still lead, but the cheese and bacon add salt and umami, the apples acidity and crunch and the hazelnuts add nutty and slightly bitter undertones. The vinaigrette brings it all together. It is a very pleasant bite and will even get kids to eat their broccoli (we tested it, it worked).

    romesco4romesco5
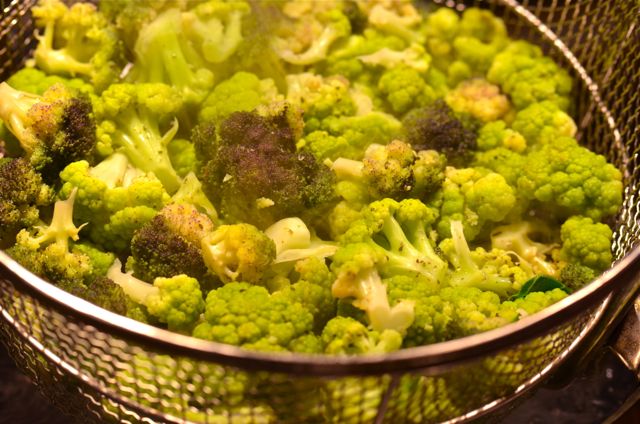
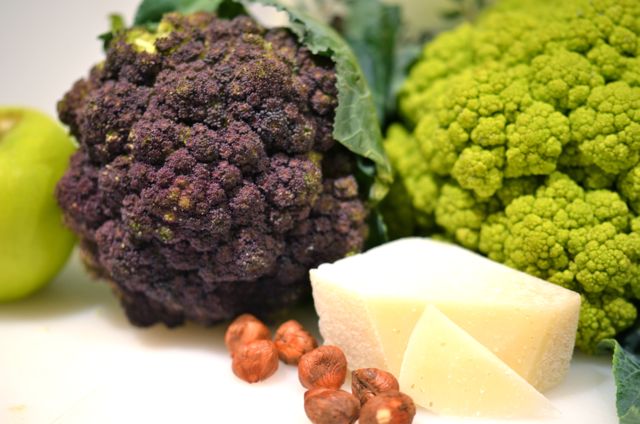
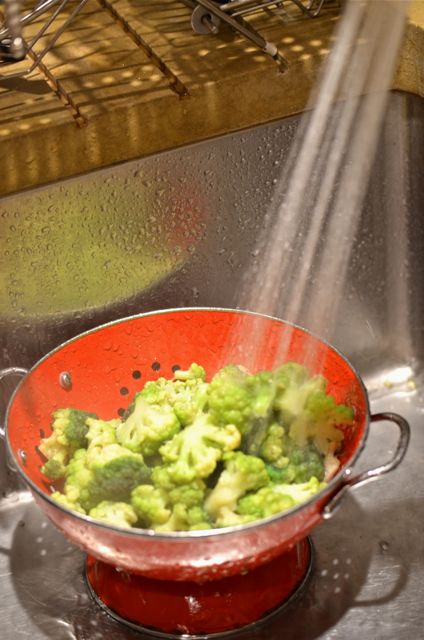
And the cool thing about this salad is that you can interchange almost any variety of broccoli or cauliflower. So if you have purple broccoli, broccoflower, romanesco or orange cauliflower, they will all work. And if you just want either broccoli or cauliflower, that works too, but we do suggest a combination as they play well together. If you get lucky at the market you can make this salad with a full range of colors, it will be beautiful and a good dish for entertaining. And all you need to do is chop and boil water, so it is an easy dish.

    romesco6romesco8 Continue reading

  • Roasted Dungeness Crab

    crab1

    Roasted Dungeness Crab. Yum.

    Here on the west coast we get a special treat every holiday season, Dungeness crab. Starting in November and running through the winter, good fish markets will have chill cases full of big, bright red, cooked crabs. And they don’t go to waste, people out here love their crabs. And Dungeness crab is a truly lovely dish. The flesh is white, tender and sweet. And while it does take some work to get at all the meat, the cracking and picking is all part of the fun.

    crab7crab8Most folks out here simply serve the crab with some lemon and mayonnaise. But roasting crab with herbs and spices is a popular way to add some flavor and develop a quick “sauce”. There are many good recipes for roasting crab with homemade curry sauce (so good, recipe soon) but that takes a little extra shopping and work. For a quick, but tasty, roast crab we use a marinade of oil, herbs, garlic and red pepper. Combine these flavors with a quick roast and some lemons and you have a very fun, flavorful meal.

    crab9crab10To say the crab in the recipe is “roasted” is a bit of a misnomer. You really marinate the crab in the herb and oil mixture for a few hours and then warm the crab and sauce in the oven for about ten minutes. The marinade and extra heat bring out more flavor from the crab. With the added flavor and rich texture of the oil, this dish feels more like a main dish than appetizer, so it is a perfect family meal. And you do get the bonus of a great smelling kitchen while you roast the crab. This dish smells as good as it tastes.

    crabSo if you have a chance to get your hands on Dungeness crab, we suggest you buy a few. Have them cracked and cleaned and bring ’em home. You can certainly serve the crab by itself, but you can make a true meal of the crabs with a tiny bit of extra work. And the extra work, which really isn’t much, is certainly worth it. Few dishes give you so much flavor for so little effort.

    Roasted Dungeness Crab:

    Notes Before You Start:

    • Cooking and cleaning Dungeness crabs yourself isn’t fun. Most good fish mongers have quality, freshly cooked crabs they will crack and clean for you. We are all for DIY projects, but  this isn’t one of them. Have your fish monger do the work.
    • Dungeness crab is pretty specific to the west coast of the US. But this basic recipe will work with any meaty, cooked crab.

    What You Get: Dungeness crab with some extra flavor. A fun, messy meal.

    What You Need: Assuming you have the fish monger clean and crack the crabs, no special equipment required.

    How Long? About 2 and a half hours, but only 5 minutes of active time, most of the time is spent marinating the crab.

    Ingredients:

    (Serves 4-6)

    • 1 cup Italian parsley, chopped
    • 2 teaspoons fresh thyme leaves, chopped
    • 1 teaspoon tarragon, chopped
    • 2 cloves garlic, peeled and minced
    • 1 tablespoon red pepper flakes
    • 1/2 cup good olive oil
    • Salt and freshly ground black pepper (to taste, but we suggest you season liberally)
    • 2,  2-pound. Dungeness crabs, cooked, cleaned and cracked
    • 2 lemons, quartered

    Assemble:

    1. Combine parsley, thyme, tarragon, garlic, red pepper flakes and oil and then finely chop using an immersion blender or food processor.

    2. Place the crab pieces in a shallow baking pan, pour marinade over crabs and toss, cover and refrigerate for 2 hours.

    3. Preheat oven to 400°. Roast crabs, uncovered, until golden brown, about 10 minutes. Garnish with lemon quarters (squeeze some lemon over the crab, if you like). Serve

  • Spiced Nuts With Fresh Herbs

    Spiced nuts with fresh herbs.

    Spiced nuts with fresh herbs.

    It seems that plenty of food sites, bloggers and magazines are posting spiced nut recipes for the holidays, and we are no exception. And the reason is very simple, spiced nuts are incredibly tasty, easy to make and are very welcome gifts. What’s not to like? Actually, the only thing not to like is your waistline after polishing off a few batches of these. But with so many other temptations this time of year, might as well enjoy the nuts and swear off them later with a New Year’s resolution. Live a little. Or give the nuts away before you eat them all. Your choice.

    nuts1nuts2While everyone likes to share their recipes for spiced nuts, the “formulas” are all over the place. Some recipes are sweet, some salty, some spicy, some with maple, (some with bacon-yum), some olive oil and some with egg whites, and you can use almost any common nuts you can find. We make a few different versions of spiced nuts, but we generally like pecans and almonds with a little spice and the extra kick of finely chopped fresh herbs. The herbs add more aroma, deeper flavor and look very pretty. We also use a touch of egg white to bind the herbs and spices to the nuts. There is no impact on flavor, the herbs and spices simply stick to the nuts better using egg whites.

    nuts3nuts4Making spiced, herbed nuts is one of the more pleasant cooking projects we can think of (probably another reason you see so many posts and recipes online). You simply select a few cups of nuts, chop some herbs, measure some salt and spices and then thoroughly toss the mixture with an egg white. Put the nuts on a baking sheet in a 350 degree oven for 15-20 minutes, mixing the nuts about halfway through, and you’re done. Your house will smell like the holidays, your family will magically appear in the kitchen, and probably your friends and neighbors, too.

    nuts5nuts6The only real trick to good spiced nuts is to avoid overcooking them. Whether you use an egg white, oil or sugar to bind the spices and herbs to the nuts, the nuts may still feel a but moist and soggy after 15-20 minutes in the oven. This is mostly from the warm oils in the nuts, not the moisture of the coating. If you wait for the coating to totally dry in the oven, the nuts overcook and be chalky and brown on the inside. The best way to test for doneness is take a nut from the oven after 15 minutes, let it cool a minute and eat it. You will find that the cooling hardens the nut and sets the coating. The nut will be crunchy and tasty. If the nuts are ready, pull them from the oven. If not, give the nuts a few more minutes then pull them and let them cool. Then be ready to eat, or share….you will have plenty of friends.

    nuts7nuts8Spiced Nuts With Fresh Herbs:

    Notes Before You Start:

    • The recipe suggests pecans and almonds, but hazelnuts, cashews, Brazil nuts, macadamias and even peanuts will work in this recipe.
    • We use raw almonds but roasted almonds will also work and will not dry with a brief cooking time.

    What You Get: Spiced nuts with some extra depth of flavor from the herbs. A great gift.

    What You Need: No special equipment required.

    How Long? About 30 minutes with 5-10 minutes of active time. Anytime dish.

    Ingredients:

    (Makes 2 cups)

    • 2 cups of raw, unsalted pecans and almonds (or other nuts)
    • 2 tablespoons dark brown sugar
    • 1 teaspoon finely chopped fresh thyme
    • 1 teaspoon finely chopped fresh rosemary
    • 3/4 tablespoon kosher salt
    • 1/2 teaspoon ground cinnamon
    • 1/2 teaspoon ground cumin
    • 1/4 teaspoon ground ginger
    • 1/4 teaspoon cayenne pepper (or to taste)
    • White of 1 egg, lightly beaten
    • Vegetable oil or cooking spray, for baking sheet

    Assemble:

    1. Preheat the oven to 350 degrees. Grease a medium baking sheet with the oil or cooking spray.
    2. Place the nuts, egg white, salt, herbs and spices in a large bowl. Mix until all the nuts are evenly coated.
    3. Place the nuts on the baking sheet and cook in the oven for 15 – 20 minutes, stirring the nuts halfway through the cooking. Remove the baking sheet from the oven, allow the nuts to cool completely and then serve.
  • Miso Cod Hand Rolls

    Miso Cod Hand Rolls

    One of our favorite all-time restaurant dishes is Nobu Matsuhisa’s Black Cod with Miso, a simple but delectable appetizer that has been knocked off (and with some success) by chefs and home cooks all over the world. If you visit one of the Nobu restaurants, you should order the dish, it is still excellent. The delicate, sweet and flaky cod with a light crust of funky, salty, umami-rich miso is a perfectly balanced bite.

    Matsuhisa’s version of the dish uses black cod and marinates the fish for 2-3 days. And while we know it’s great, it is hard for even food bloggers to plan that far ahead, and we don’t have easy access to black cod. We also needed to beef up the dish a bit to be a main course. But since we have very tasty local rock cod here in Norcal, and we make lots of sushi and/or coconut rice, we adapted a quick version of miso cod (from Food and Wine) for use in rice bowls or hand rolls. And what we get is a very flavorful, easy and healthy meal. The kids even like it (hand rolls are fun).

    And making this dish is very easy, the only variable is time. It only takes a few minutes to mix a marinade of white “shiro” miso, mirin (Japanese cooking wine), sake and sugar. Then you marinate the fish. A half hour marinade time does work, but a full day or overnight is even better. The longer the marinate, the deeper and sweeter the miso flavor. Otherwise, simply make some white rice (we like Japanese medium-grain rice), cut up some nori, dice some veggies like carrots, radish and arugula, saute some shiitake mushrooms, slice up an avocado and break out the pickled ginger, soy sauce and Sriracha.

    We serve the cod two ways. The first is a simple bowl with the rice topped with miso cod, mushrooms, avocado, veggies and slivers of nori. But the real fun is making the hand-rolls.  Just cut the nori sheets into 2×2 inch squares, add in a tablespoon of cooked rice and then layer in the fish and other garnishes. The hand rolls make for a perfect bite. These are great as dinner, but also fun to serve as a snack at parties. But be sure to enjoy a hand roll before you share them, these tend to go fast.

    Continue reading

  • Simple Garden Recipes: Leek And Potato Soup

    Leek and Potato soup.

    Sometimes food recipes are like cocktails. If you get a good recipe, the ratios just work, even if you make variations on the edges. The flavors evolve, but everything stays in balance and tastes great. For cocktails, the “New Orleans Sours” with the 2-1-1 (two parts spirit, one part sweet, one part sour) ratio of the Margarita and Sidecar come to mind. Add some salt, a little sugar and/or some bitters or a new liqueur, the drink will change, but still be good. When we look for savory dishes with “perfect” ratios, there are few better ratios than 4-4-6, the ratio for leek and potato soup. If you want an easy, flavorful, and almost foolproof dish, this is it.

    And, not surprisingly, this recipe comes from Julia Child. We won’t wax poetic (it has been done, and done better than we will ever do), but it is safe to say that Billions (with a capital B) of meals have been, and will be, better because of her work. And many of her recipes, along with the recipes of her sometimes cooking partner Jacques Pepin, remain the standard for simple, classic cooking. For every seemingly overwrought, complex and overly “French” recipe, Julia (and Jacques) have dozens of simple country dishes that just rock. This is one of those recipes. And it’s a good one.

    At the most basic level, all you need is four cups of diced Russet potatoes, four cups of sliced leeks and six cups of salted water. Cook for twenty to thirty minutes and you’re done. And it will be good, and very stick to your ribs satisfying. But maybe you want to use chicken stock, maybe add a touch of cream, maybe garnish with chopped chives, ground black pepper or some smoked paprika? Perhaps you want to purée the soup (we think you should). Maybe you want to serve the soup chilled? Vichyssoise is just a step away. And if you want to sprinkle on some crispy bacon or pancetta, you are a kindred spirit, live long and prosper.

    Hopefully, you get the idea. If you make this soup, follow the general recipe and then adapt it to your tastes. We use chicken stock, purée with an immersion blender, stir in a touch of cream and garnish with what we have.  Do what you like, as you will build from a solid foundation. And one last note, eat this dish and you will be full. This dish isn’t all that fattening, but it is filling. But as winter sets in, and you need a warm and tasty dish (and a nap) at the end of the day, this will do the trick. Thanks Julia.

    Leek and Potato Soup:

    (Adapted from Julia Child)

    Notes Before You Start:

    • Russet or Yukon Gold potatoes will work best for this recipe. Waxy potatoes will not break down as well when boiled or add enough starch to the broth.
    • Garnishes for this dish are endless. If you have left over proteins, just dice and brown them and add to the soup. Then you have a complete dinner.

    What You Get: A very flavorful and filling soup that’s easy to make.

    What You Need: No special equipment required. If you want to purée the soup and immersion blender, food processor or blender will work.

    How Long? About 40 minutes with 10 minutes of active time, mostly peeling and chopping veggies. Anytime dish.

    Ingredients:

    (Serves 6 – 8)

    • 4 cups sliced leeks
    • 4 cups peeled and diced potatoes
    • 6 cups water or chicken stock (add another cup for a thinner consistency)
    • 1 tablespoon salt (if using water, or to taste if using chicken stock)
    • 1/2 cup (or more) heavy cream, sour cream or crème fraîche (optional)
    • Chopped chives, freshly ground black pepper, bacon bits or smoked paprika for garnish (optional)

    Assemble:

    1. Peel and cut the potatoes into 1/4 inch dice. Clean the leeks of all sand and dirt (see photos) and cut into 1/4 inch slices. Add the potatoes and leeks to a large lidded pot and add the water and salt or chicken stock.
    2. Bring the pot to a boil and then lower the heat to a simmer. Cook the soup, partially covered, until the potatoes and leeks are very tender, about 25 – 30 minutes. Taste and adjust for seasoning. Garnish and serve.
    3. Or remove the soup from the heat and  purée the soup with an immersion blender or in a food processor or standing blender. Stir in the cream. Garnish and serve.
  • Easy, “Perfect” Mashed Potatoes

    Easy, Perfect Mashed Potatoes.

    Ah, the “Mashed Potato Martini”, the symbol of swanky 1990’s catering. A cocktail glass brimming with buttery mashed potatoes and topped with your choice of butter, sour cream, bacon, cheddar cheese, chives and parsley. A pleasant, if somewhat excessive, relic of the dot-com era. But just as the excesses of dot-com left some valuable companies and technologies in their wake, the mashed potato martini left us with a valuable legacy, we got serious about making “perfect” mashed potatoes.

    And by “perfect” we mean, tasty, easy and predictable. And a recipe that easily scales for large events. After a few years of intermittent experiments we developed this recipe / process and never looked back. The basics are simple, we use Yukon Gold potatoes and plenty of cream, butter and salt. And we have just a few techniques that make a big difference in texture. And, of course, we add a plenty of extra butter, bacon, cheese, etc. We just don’t believe in “light” or “healthy” mashers. We save that for kale dishes.

    As for the ingredients, the main difference is using Yukon Gold instead of starchy Russet potatoes. The Yukons are a mix between waxy and starchy potatoes, and they have an overt “buttery” flavor. The big advantage of the Yukons is that they don’t dry out like Russets. So while you do need cream and butter, the Yukons add their own moisture without being watery. You get a creamy texture and pronounced potato flavor to match the dairy and salt. Good stuff.

    As for the key techniques, they are also very easy, but important. Firstly, after you drain the potatoes, put them back in the hot pot and mash with the warm dairy. The hot pot dries out any extra water (you don’t want watery mashers). Secondly, only mash just enough with the masher and then move to folding with a spoon. Too much mashing makes for a gluey texture, better to have a few lumps. And finally, have extra butter and milk ready to mix into the mashers if they seem stiff or dry. And feel free to keep adding butter…hard to go wrong. Then adjust seasoning, serve with more butter on the side and you’re done. All in less than 30 minutes. Perfect.

    And if you want to be “fancy” there are a few other steps you can take. If you just hate lumps, you can run the mashers through a fine mesh strainer to get a very smooth consistency (if you do this, you may as well add as much butter as you can- like a mousseline). And lastly, if you want to pull out the martini glasses and add a bunch of garnishes you may get a few extra smiles at the table. A slightly ridiculous, but also delicious, dish for the “holidaze”.

    Easy, Perfect Mashed Potatoes

    Notes Before You Start:

    • Yukon Gold potatoes are widely available. Use the largest Yukons you can to save time on peeling.
    • This recipe is for 4 – 6 as a side, but scales easily for larger groups.

    What You Get: Like we said, perfect mashed potatoes.

    What You Need: A potato masher, or a ricer. But the masher is the best tool for this recipe.

    How Long? About 30 minutes, with 10 minutes of active time. This is an anytime dish. Continue reading