The Best Strawberry Jam.
 So what makes this strawberry jam the best? Well, it is just strawberries, sugar and lemon juice, so nothing gets in the way. If you have ripe, sweet strawberries, this is the real deal. And we use a technique that makes the process much, much easier. If you like jam, but don’t like all the specialized gear and the huge tub of boiling water, we have a solution: the oven.
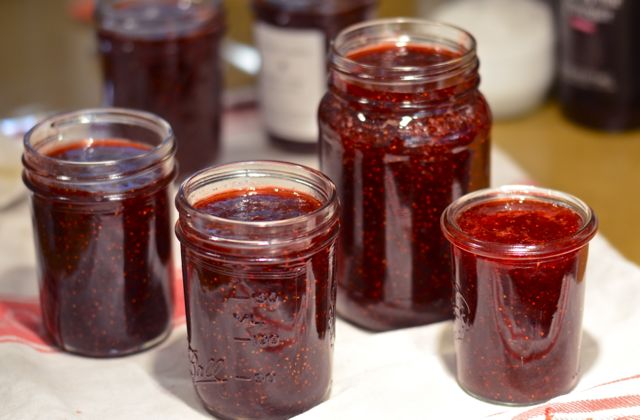
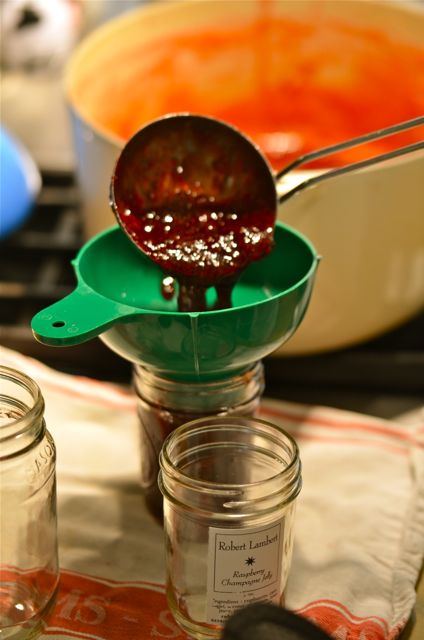
 It turns out you can sterilize your jars and lids in the oven, You can process the jam, too. (Just make sure your oven is true to temperature, they often are NOT, use an oven thermometer to be sure). Simply place your clean jars and lids on a baking sheet and heat in a 250 degree oven for at least 30 minutes. Remove the jars from the oven when you need them. Then fill the jars with jam, leave a 1/4 inch of room, wipe the rims clean, place the lids on, seal them and put the jars back in the oven for 15 minutes. Then take the jars out of the oven and they will seal as they cool. So. Much. Easier.
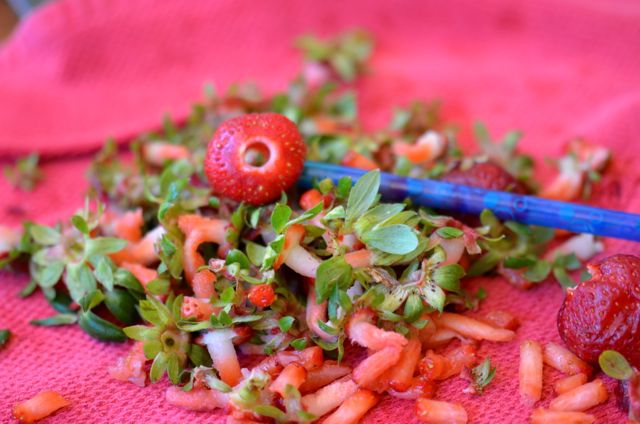
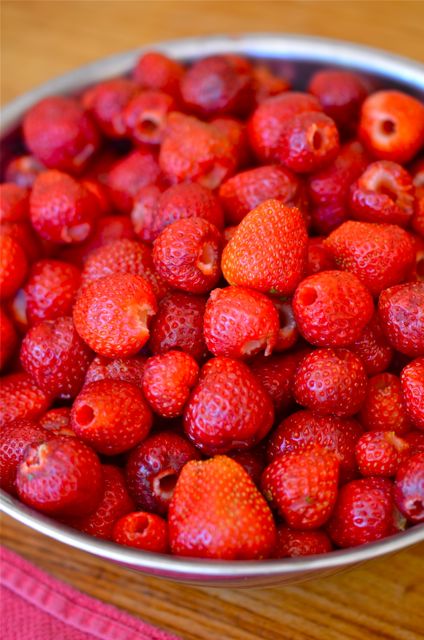 The other fuss about making jam usually has to do w/ pitting and skinning fruit, or in the case of strawberries, hulling. There are specialized hulling tools, but we use strong plastic straws (flimsy won’t work here) and run them from the bottom through the center of the strawberries. It is the fastest way to hull the strawberries, and something anyone (read, your kids or guest) can
 be dragooned volunteer to do. It’s almost fun, and you can snack on a few berries along the way.
 As for the jam, we adapted the recipe (and the oven technique) from Blue Chair Fruit Company in Berkeley. Blue Chair has fine jams and marmalade, gear, classes and one of our favorite cookbooks. Worth a visit.
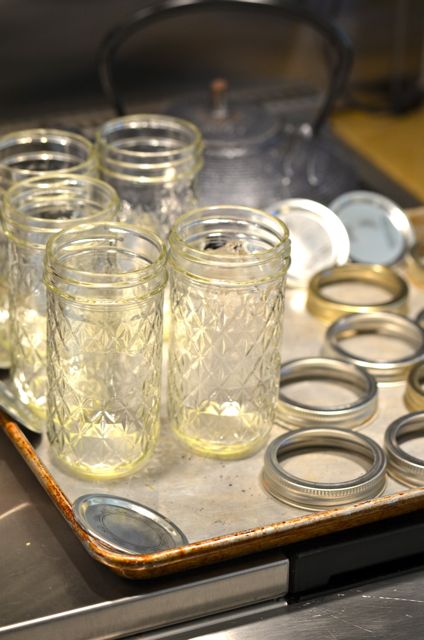
Normally, Blue Chair features some very “advanced” jam recipes with fruit combinations, herbs, spices and even a touch of booze (always welcome). But for this recipe we go back to the basics, strawberries, sugar and lemon. And if your berries are at their peak (and you bought/grew too many, like us), this recipe is the way to go. Simple, easy, delicious…and perfect on buttered toast at breakfast.
 The Best Strawberry Jam:
(Adapted from the Blue Chair Jam Cookbook)
Notes Before You Start:
- You can use your standard processing method for this recipe if you prefer, but the oven is worth a try.
- If a few jars of the jam don’t seal, not to worry. Just put them in the fridge and eat them first. They will last for 2 weeks (but probably won’t, this is tasty jam).
What You Get: Classic, tasty strawberry jam. Less mess and fuss if you use the oven technique.
What You Need: Jars and lids. Ball jars are good. Strong plastic straws or a strawberry huller will make life much easier.
How Long? A couple of hours, but with 30-40 minutes of active time. The oven method knocks down the active time. Weekend project….but a good one.
Ingredients:
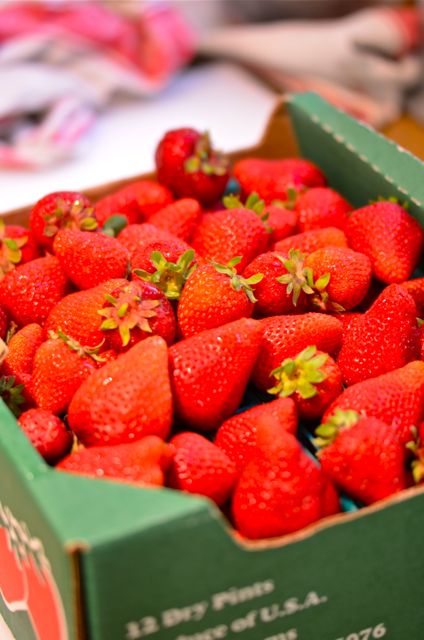
- 4 pounds strawberries, hulled
- 2 pounds 10 ounces white cane sugar
- 3 2/3 ounces plus 2 2/3 ounces freshly squeezed lemon juice
Assemble:
- Place 3 or 4 metal spoons in the freezer.
- Sterilize your jars and lids using your preferred method and following manufacturer’s instructions.
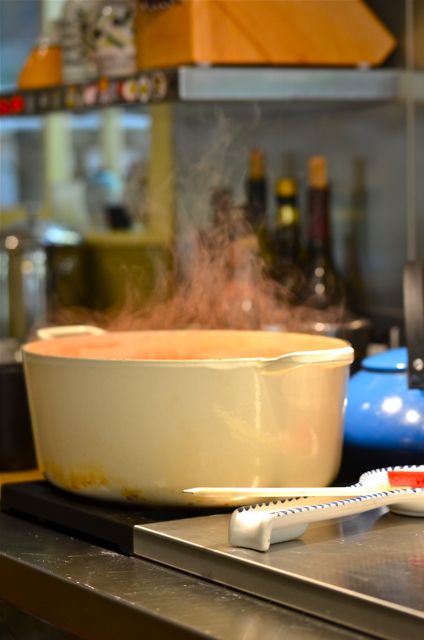
- Put the strawberries, sugar and 3 2/3 ounces of the lemon juice in a large, nonreactive pot or preserving pan. Place the pot over medium-low heat and cook, stirring constantly with a heatproof spatula. After a few minutes, once the juice starts to run from the berries, raise the heat to high and stir often.
- Cook for another 20-30 minutes. Stir every minute or so and make sure to scrape the bottom of the pan to avoid burning or sticking. Cook until the foam subsides and the color darkens and gets a glossy look, about 25 minutes.
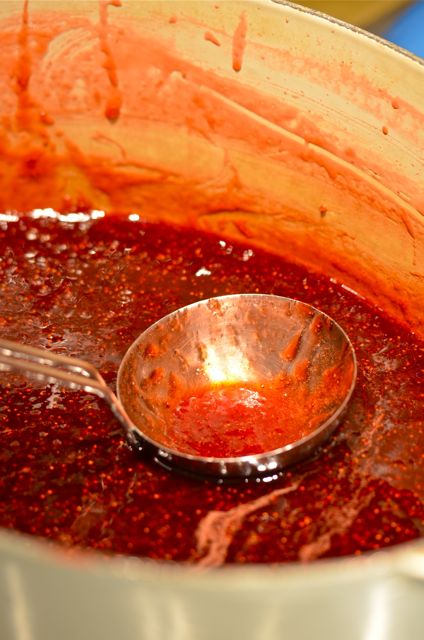
- Stir in the remaining 2 2/3 ounces of the lemon juice and then cook for another 3-5 minutes. The jam should look thick and shiny.
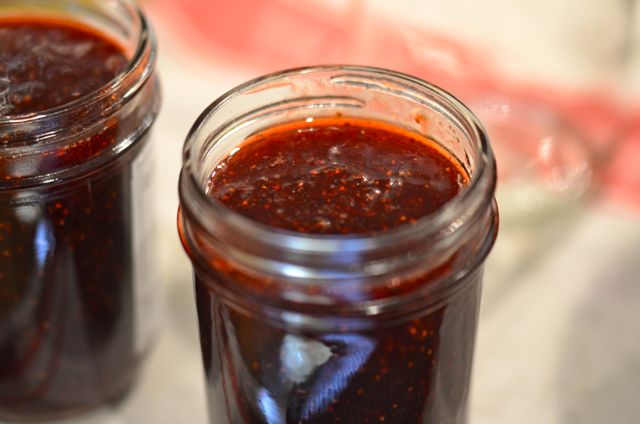
- Remove the jam from the heat and carefully skim off any white foam from the top of the jam, do not stir.
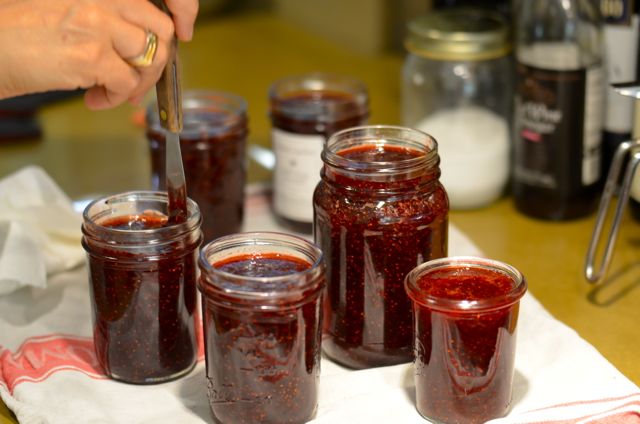
- To test for doneness, dip one of the spoons from the freezer into the jam. Place the spoon back in the freezer for a minute or two, you will know if the spoon is ready if when you remove the spoon from the freezer, the bottom of the spoon feels like room temperature. Now tip the spoon (over the sink is always a good idea), if the jam runs off slowly (and seems gloppy), it’s done. If the consistency is thin, cook for a few more minutes and test again.
- Process the jam in the sterilized jars using your preferred method and following manufacturer’s instructions.
Related articles
- Strawberry Jam (helenasbistro.wordpress.com)
- Strawberry Raspberry Jam (kristinsmission.com)
- Strawberry jam (theafterschoolcaketin.wordpress.com)
- Homemade Strawberry Jam (cultivatingtrio.com)
- Jammin! (cookingexploitz.wordpress.com)
- sexy strawberry jam (witchininthekitchen.com)
- Storing summer in a jar … Strawberry Jam (goodfoodeveryday.wordpress.com)
- How to Make Strawberry Jam with the Ball FreshTECH Automatic Jam and Jelly Maker (momgenerations.com)

Love Blue Chair!!! That’s a pretty batch of jam you have there. Didn’t make jam with my last you-pick strawberry haul, but thinking now I should have. Have also heard the dishwasher is good for sterilizing. ??
You do good work in that kitchen of yours. Oh. yum. 😀
Thanks. Not an expert, but I guess some dishwashers sterilize and some don’t. But it is one method (anything better than all of that boiling water).
We’ve made a bunch of Blue Chair Jams and they never fail…great stuff / cookbook…
I’ve been searching for a good jam recipe for a while now! Will definitely give yours a shot. Thanks so much!
Thanks- hope you like it!
I never bother to sterilize my jars, I just wash and rinse them, then add them to the pot with the water and let them get hot and sterile while the water is boiling. (I guess I’d rather have boiling water than the oven on right now? Lately I’ve been blanching veggies in the leftover canning water, so it’s getting some additional use. Last year I cooked corn in the leftover canning water.)
However, my strawberries are all in the freezer–topless, but otherwise untouched. This would work with thawed berries I think.
Thanks!
Hi- the thawed berries would be fine. The big pot of water just takes forever to heat up- so we like the oven. But, either way the kitchen is a bit of a sauna when you make jam… 😉
Using the oven is a great idea. I might try that in cooler weather. Today I made Strawberry Plum freezer jam.
i will have to try this oven method! thanks for sharing! i am also intrigued by the blue chair cookbook! i have a love affair with cookbooks and now i have another one to add to the list, thanks a LOT lol 😉
I’m really tempted to try this! I love a good strawberry jam and this sounds like an excellent way to proceed. I think the hulling with a strong straw is simply brilliant! 🙂
A sauna is exactly what my apartment turns into when I make jam! No more now that I know that I can sterilize the jars in the oven. I really had a “Duh!” moment when I read that. Such a simple solution and I can’t believe that it never occurred to me!
My recipe is basically yours (strawberries, sugar, lemon juice), but the problem with my strawberry jam is that is always turns out runny, no matter how long I cook it. I don’t hull the berries . . . do you think that contributes to it?
WHO KNEW you could sterilize jars in the oven! Brilliant! Also, fab idea to use a straw to hull them. That would really speed things up.
Speaking of strawberries, we had a nice crop of wild strawberries here in the Canadian Rockies. They are very small but such intense flavour! Sadly, not enough for jam, though…
But great for eating out of hand, I bet…the wild berries are soo good. (we still forage for blackberries in late summer)
This is my first time we visit here. I ran across so many entertaining stuff inside your blog, specially its conversation. From the tons of comments on the posts, I reckon that I am not the only one having all of the enjoyment below! Keep up the excellent work.
Thanks for the visit and kind words! Hope you enjoy the blog and recipes.
I love the straw methods to core the strawberries! I’ve been meaning to try it!
Thx- it does work…
Have a huge crop of wild strawberries in our back yard this year…guess because it was so cold last winter. They are mid-sized, more rounded than pointed and just begging to be made into wild strawberry jam. Have NEVER made jam before, but am willing to try your recipe, but don’t like using a lot of sugar. Do you have to use a special pectin for lower sugar? Thanks for the pictures and info….
I see you don’t monetize your blog, i think there is one opportunity to earn additional money
on your site, search in google for- idol4jp makes money
Pingback: Homemade Bread - Corine A to Z